admin
Sonic instructions
You’re just small steps away from accessing the 24x capital multiplier and putting your funds to work with automated trading.
Below is a step-by-step registration guide.
Click the button below. The registration page will open in a new window, allowing you to follow the instructions and complete the registration conveniently. The registration instructions are provided below the button.
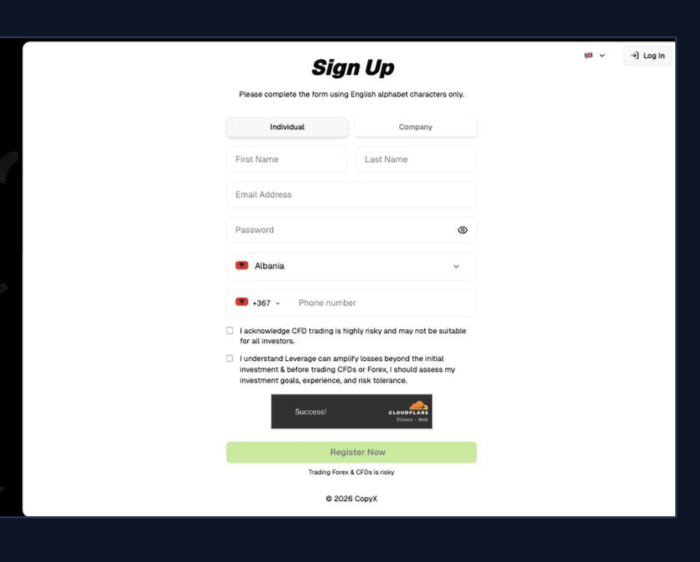
1. Create Your Account
After clicking the button, a registration page will open in a new window. Complete all the required fields and click “Register Now.”
2. Verify Your Email
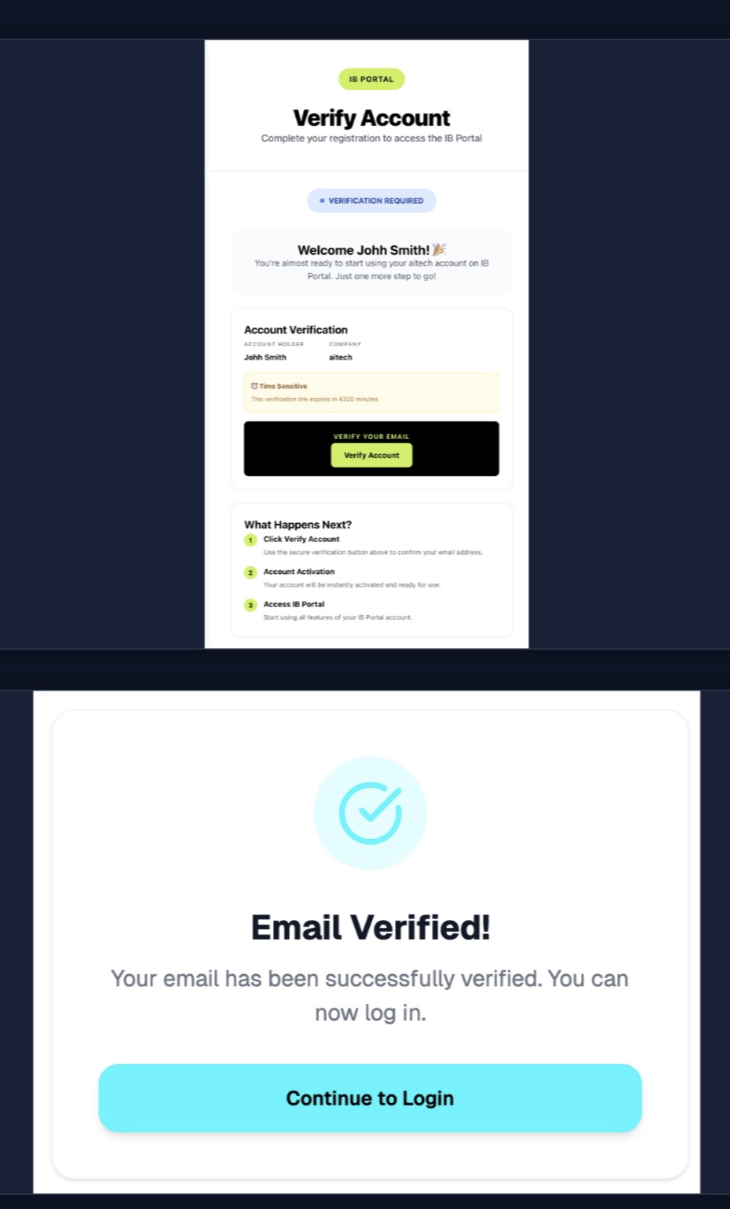
You will then receive a confirmation email. Look for an email titled “Welcome — Verify Your aitech Email.”
Click “Verify Account.” On the verification page, click “Continue to Login.”
3. Log In to the aitech
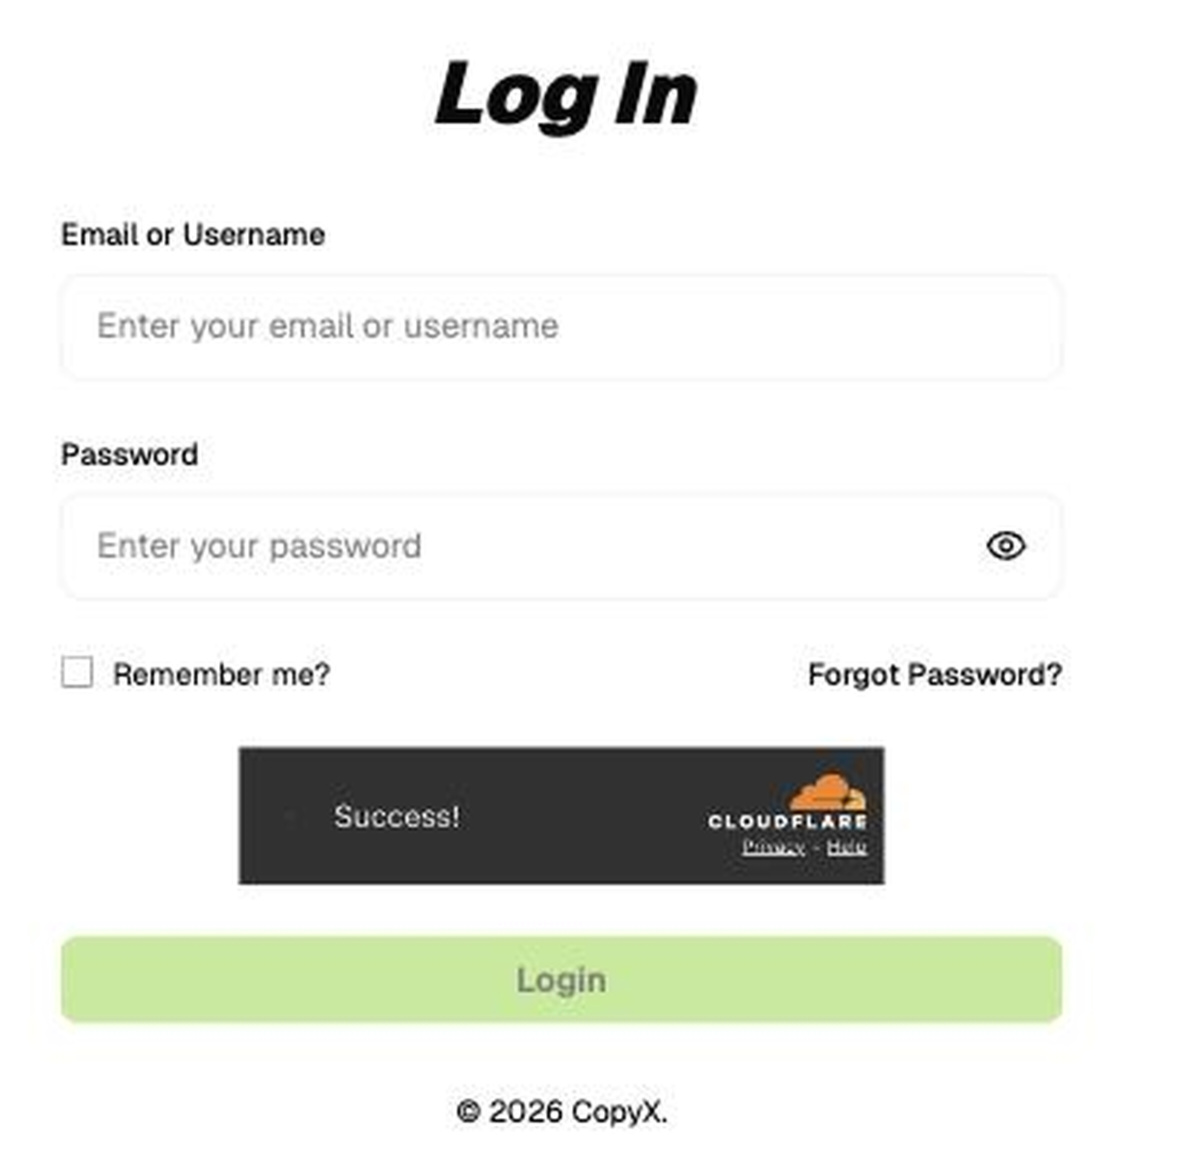
Log in to the aitech using the email address and password you just registered.
Enter your details and click “Login.”
4. Complete the Suitability Survey
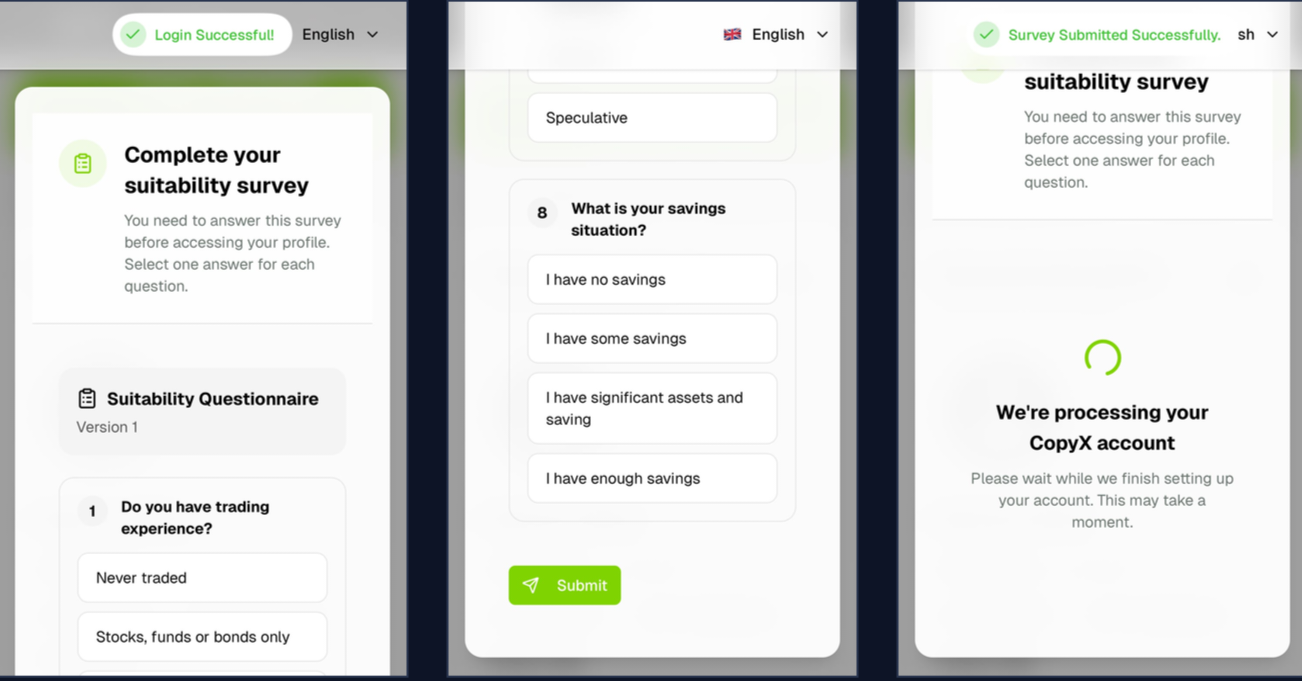
Immediately after your first login, the “Complete your suitability survey” section will appear.
There are eight questions in total. Your profile will only become available after you answer them.
Select one answer for each question and click “Submit” at the end.
The survey asks about your trading experience, preferred position size, the potential impact of losses, employment status, financial situation, financial background, risk tolerance, and savings.
Answer the questions honestly, as this is the broker’s required suitability assessment.
After clicking “Submit,” you will see the message “Survey Submitted Successfully”
5. Register Your CopyX Account
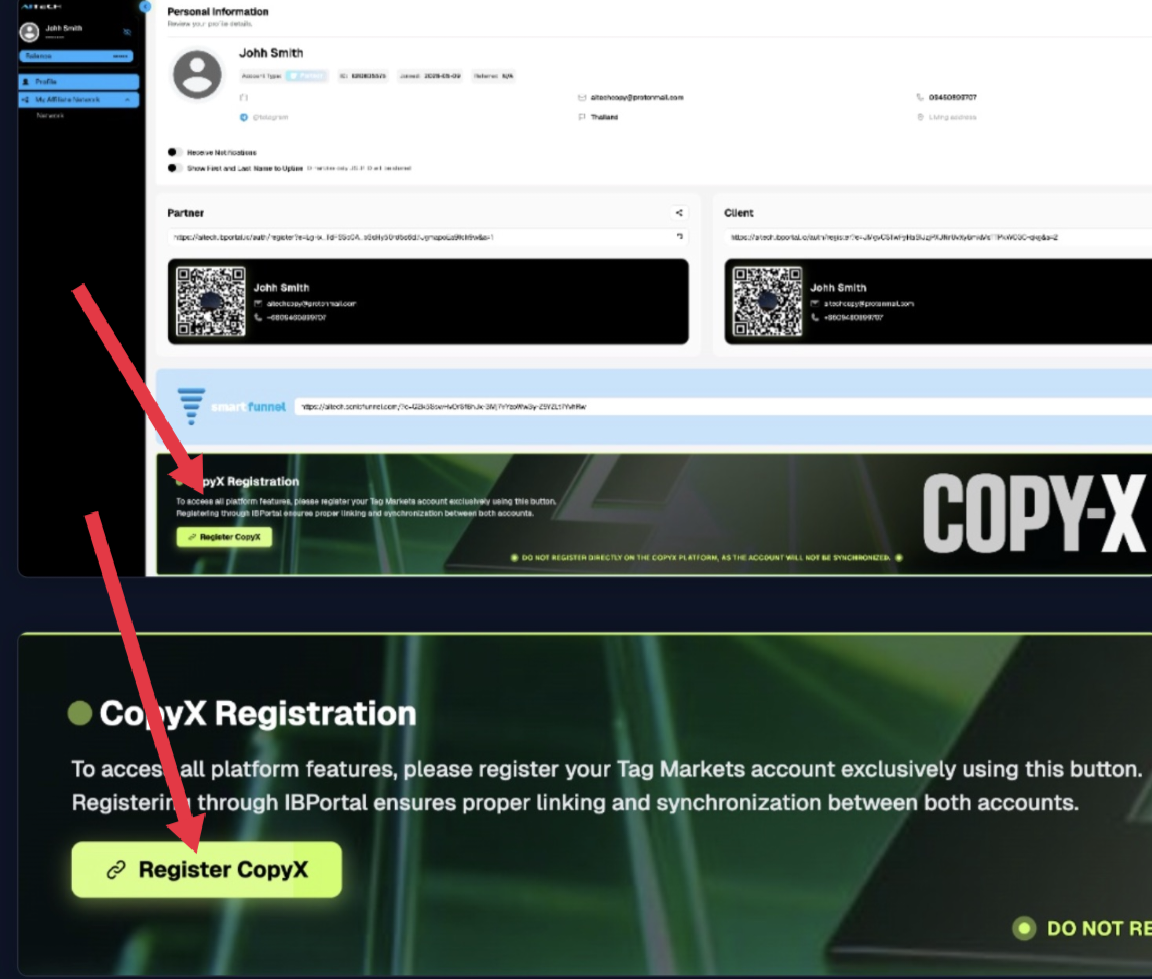
Once your account is ready, stay on the aitech homepage and scroll down until you find the CopyX Registration card.
Click the green “Register CopyX” button. This creates your linked TAG Markets account automaticaly.
6. Sync Your Account
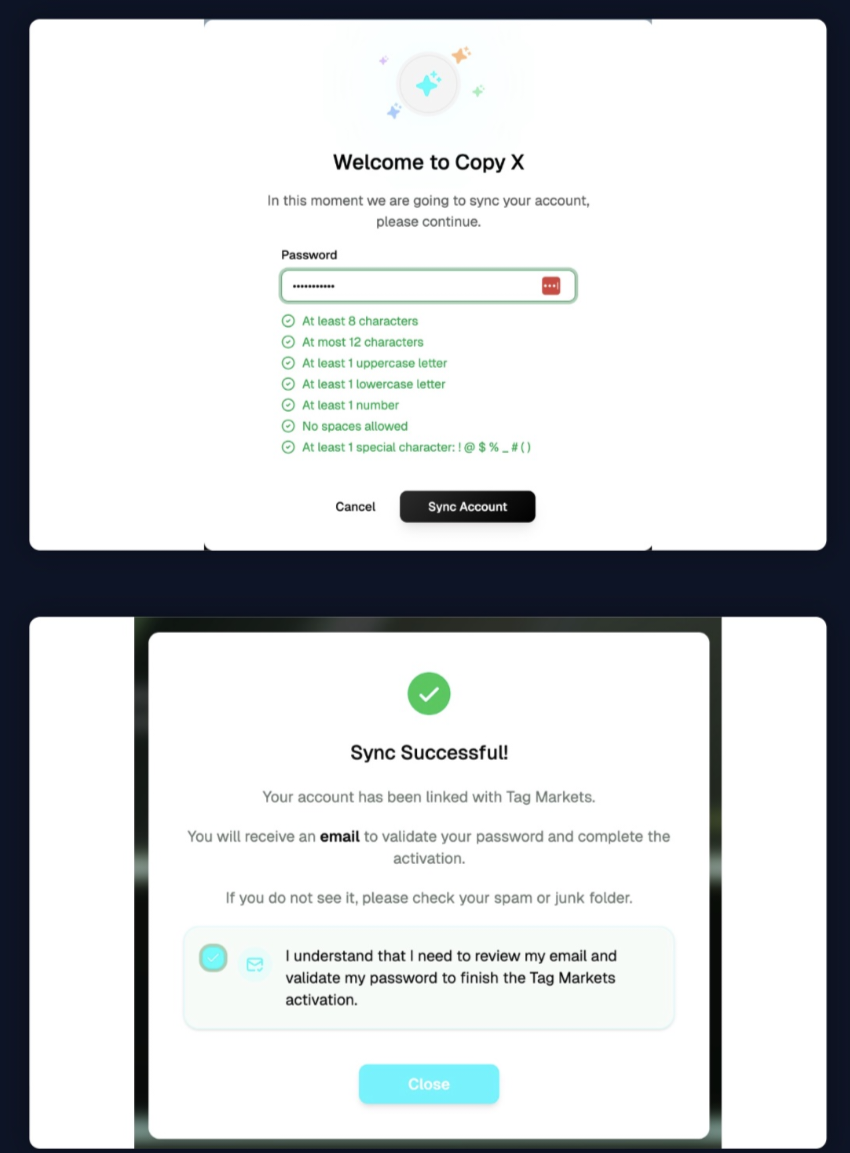
A “Welcome to CopyX” pop-up window will appear. Here you can create a password for your TAG Markets account.
The password can be the same one you use for the IB portal.
Enter a password that meets the requirements, click “Sync Account” and tick the confirmation box.
Then click “Close”. Your TAG Markets account is now ready.
Make sure to save the TAG Markets password you created, as you will need it for future logins.
You will not receive another email confirmation because your email address was already verified during the initial registration.
You can log in to TAG Markets using the same email address and the newly created password, either through the “Login to CopyX” button in your CopyX profile or directly through the TAG Markets login page: https://portal.tagmarkets.com/login
7. Verify Your Identity (KYC)
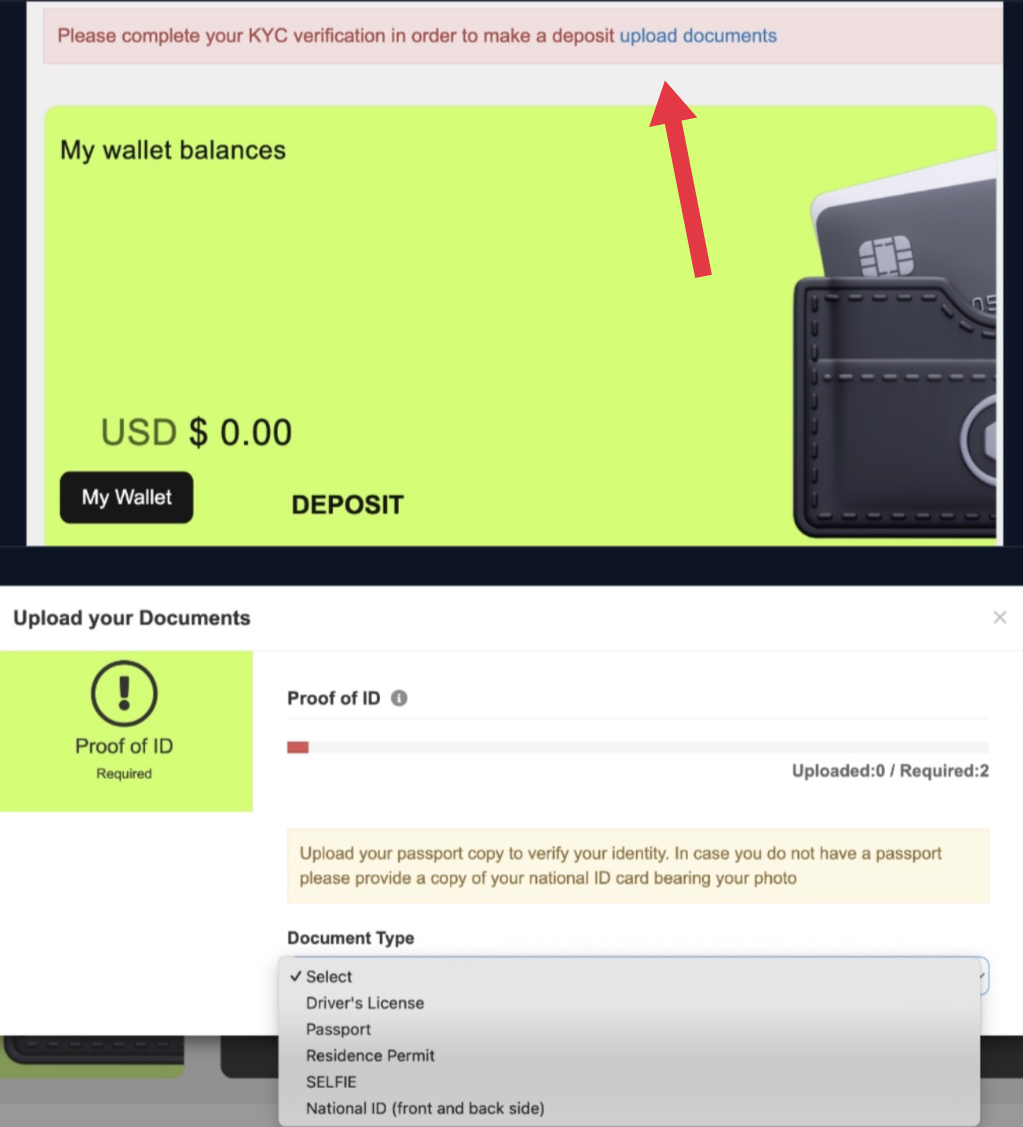
At the top of your TAG Markets dashboard, click “Upload Documents” on the red KYC banner.
Then select two documents from the dropdown menu and upload them.
Accepted documents include:
– Passport
– ID card — front and back
– Driver’s license
– Residence permit
– Selfie
Select the two required documents and upload them.
Once the documents have been uploaded, identity verification will begin. This usually takes only a few minutes.
8. Make a Deposit
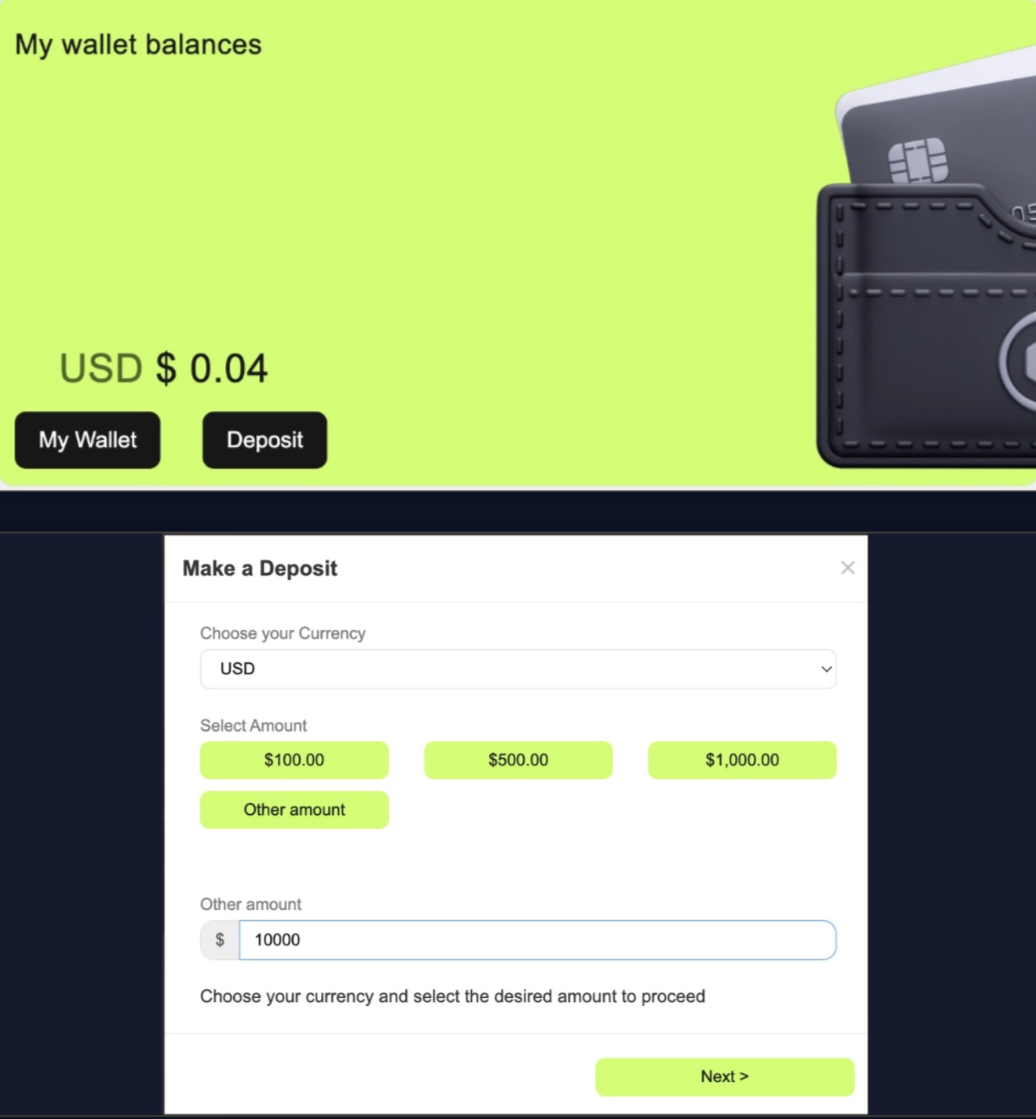
On the TAG Markets dashboard, click “Deposit” on the wallet card.
Select USD as the currency. Then choose one of the preset amounts or enter your desired amount under “Other amount”
Once you have selected the amount, click “Next”
It is recommended to start with an amount that fits your goals and financial circumstances. You can always add more funds to your account later if needed.
9. Choose a Payment Method
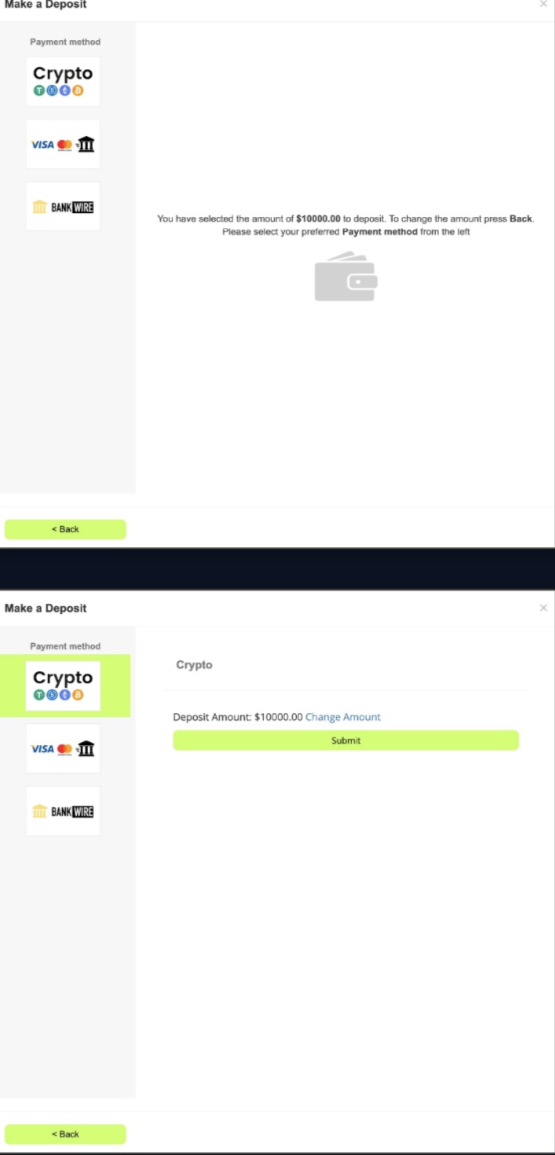
Choose your preferred payment method from the payment options panel.
Crypto is recommended for faster processing. Deposits usually arrive within 1–5 minutes and have a 0% fee.
Visa / Mastercard allows you to deposit using a bank card, but a 6% fee applies.
Bank Wire means a bank transfer and usually takes 1–3 business days.
Once you have selected your preferred payment method, click it and then click “Submit.”
10. How to Make a Crypto Transfer
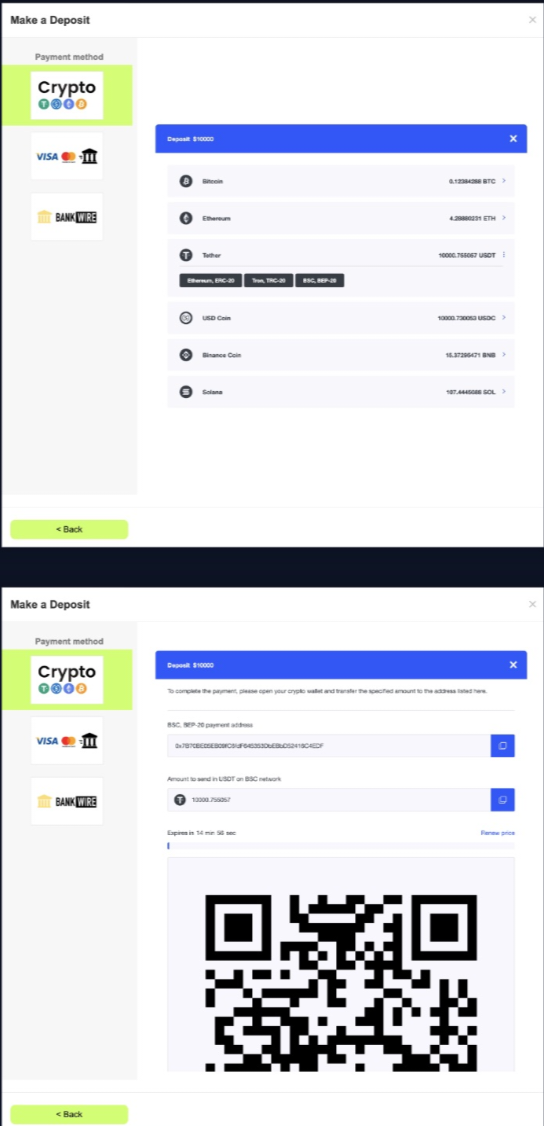
Select one of the following cryptocurrency networks:
– BSC BEP-20
– Tron TRC-20
– Ethereum ERC-20
The supported cryptocurrencies are USDT and USDC.
Copy the payment address and send the funds from your crypto wallet to your TAG Markets wallet.
CRITICAL — WRONG NETWORK = FUNDS MAY BE LOST!
The network you select in TAG Markets must exactly match the network you use to send the funds.
For example, if you select BSC BEP-20 in TAG Markets but send the funds using Tron TRC-20, the funds may be permanently lost.
Always double-check the network on both sides before clicking “Send.”
Important: Use the same withdrawal method as your deposit method. If you deposit using crypto, you can withdraw using crypto as well. (Money Laundering Law.)
Here is a detailed guide explaining how to set up a secure crypto wallet, how to transfer funds to your TAG Markets wallet, and how to transfer your profits back to your bank account.
11. Connect Sonic for Automated Trading
Open the menu on the TAG Markets homepage and select CopyX at the bottom.
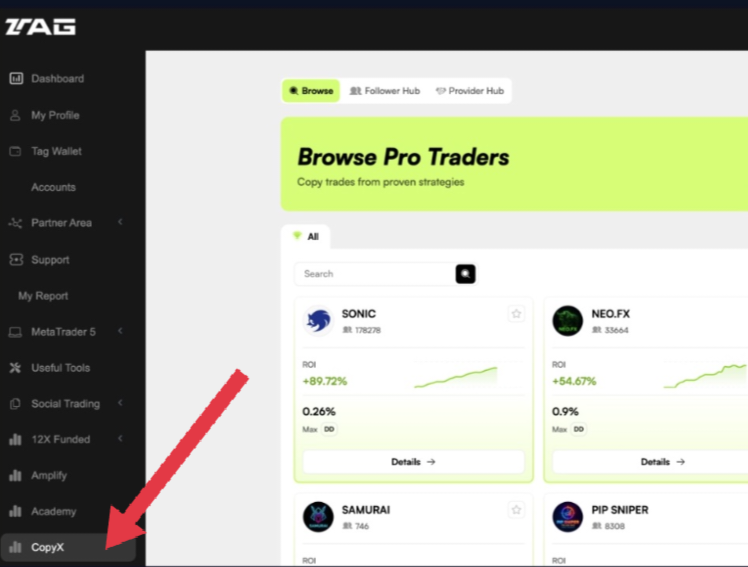
A page with different trading strategies will open.
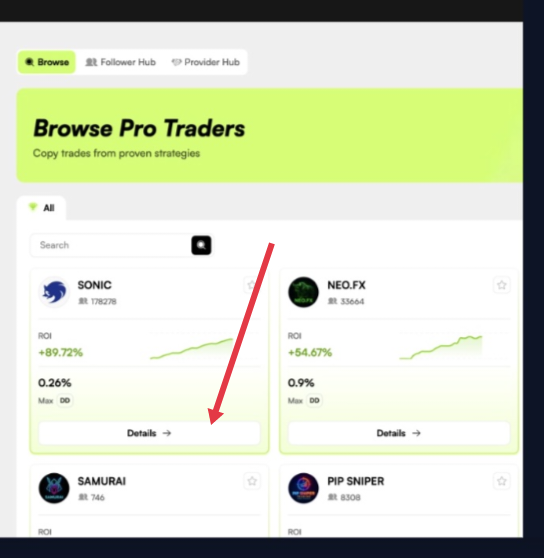
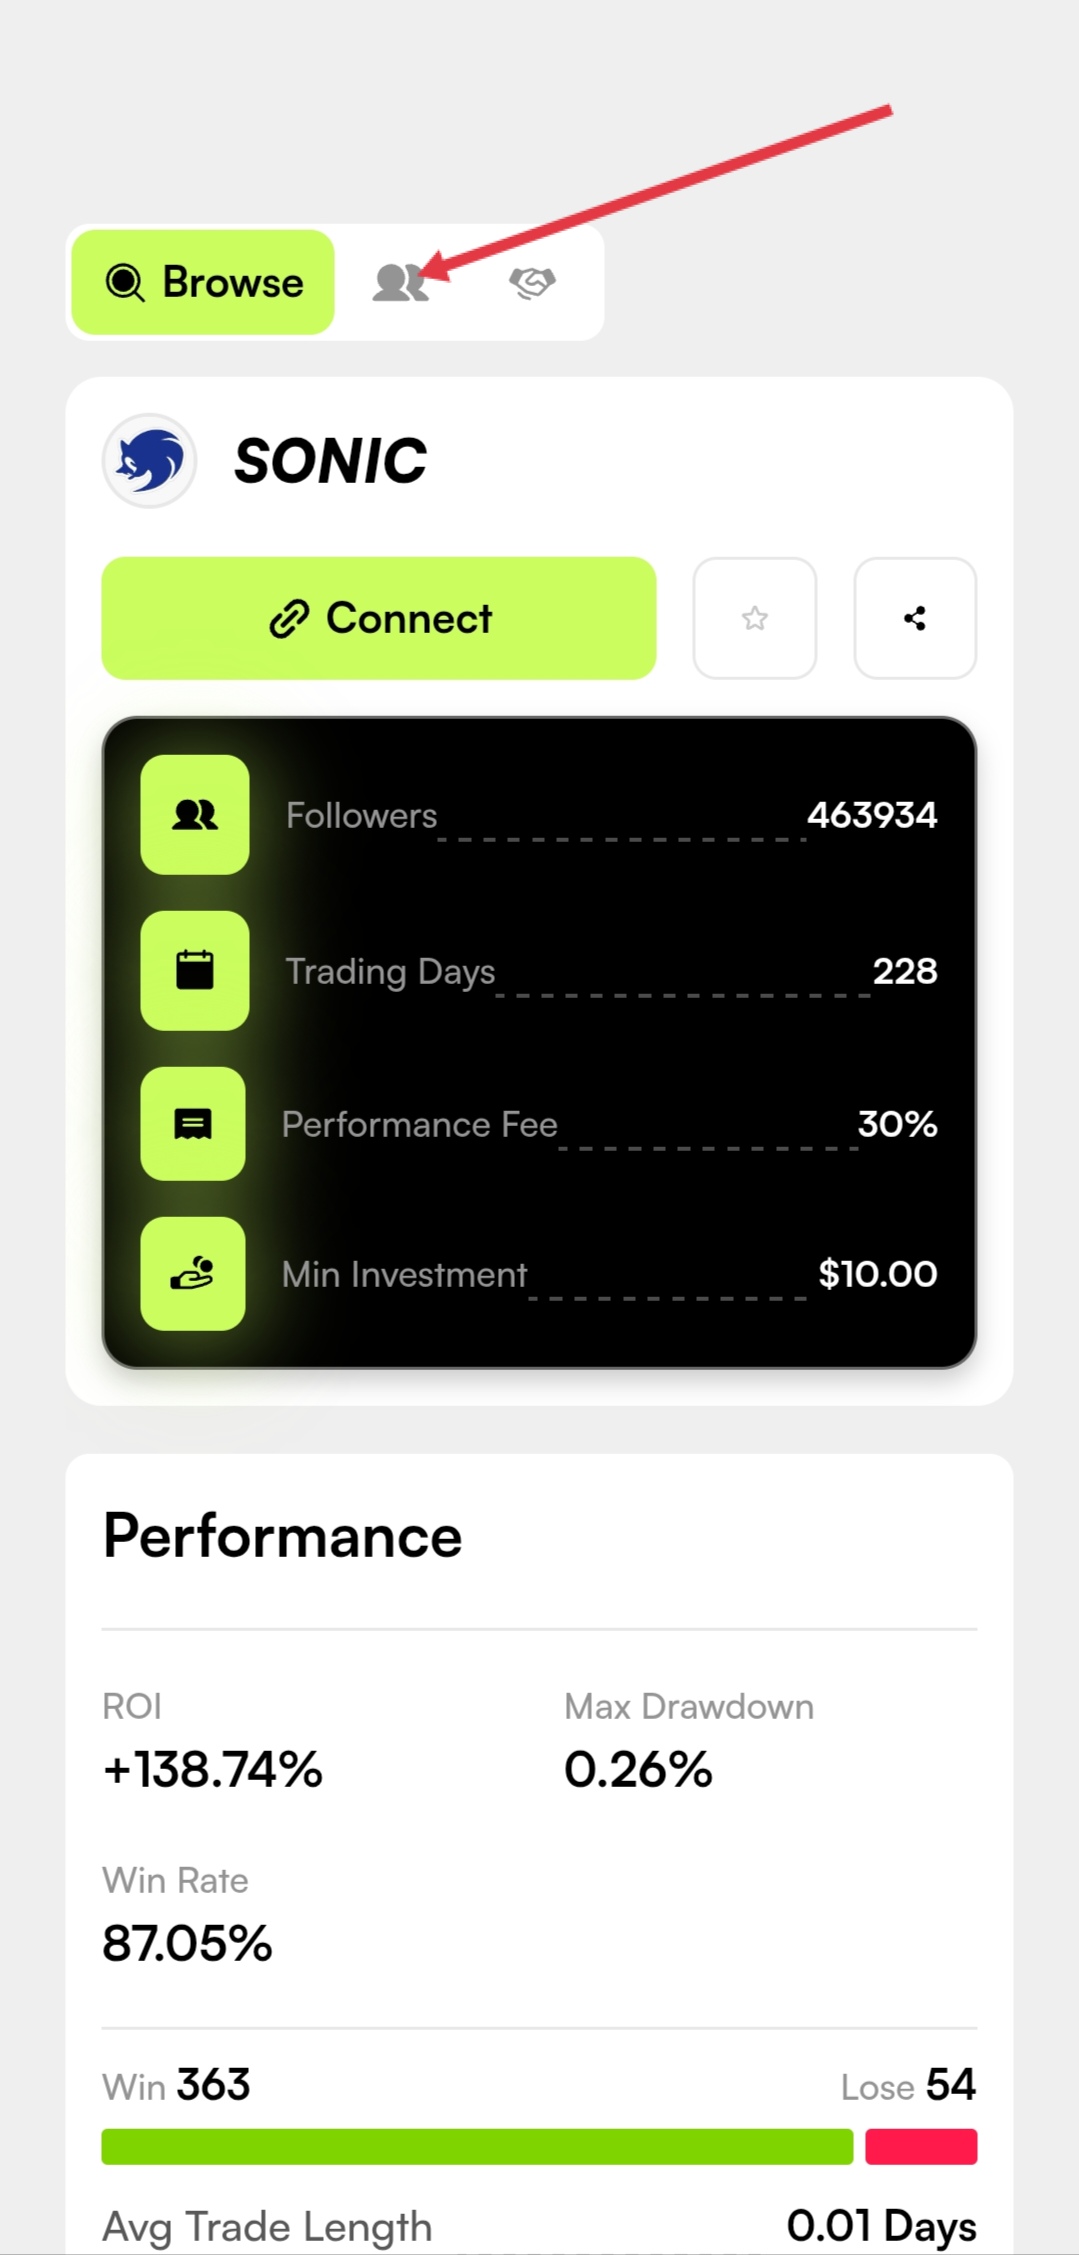
Select the first strategy, Sonic, and click “Details.”
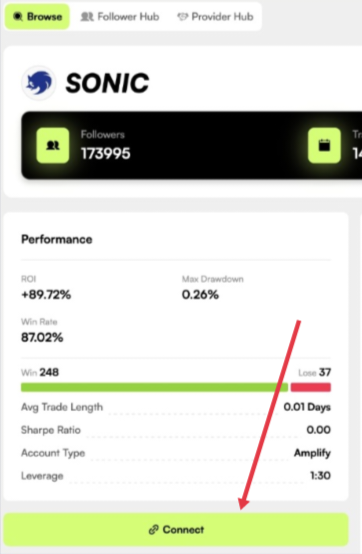
Review the live performance and trading history. Then scroll to the bottom of the page and click “Connect” to begin setting up the copy strategy.
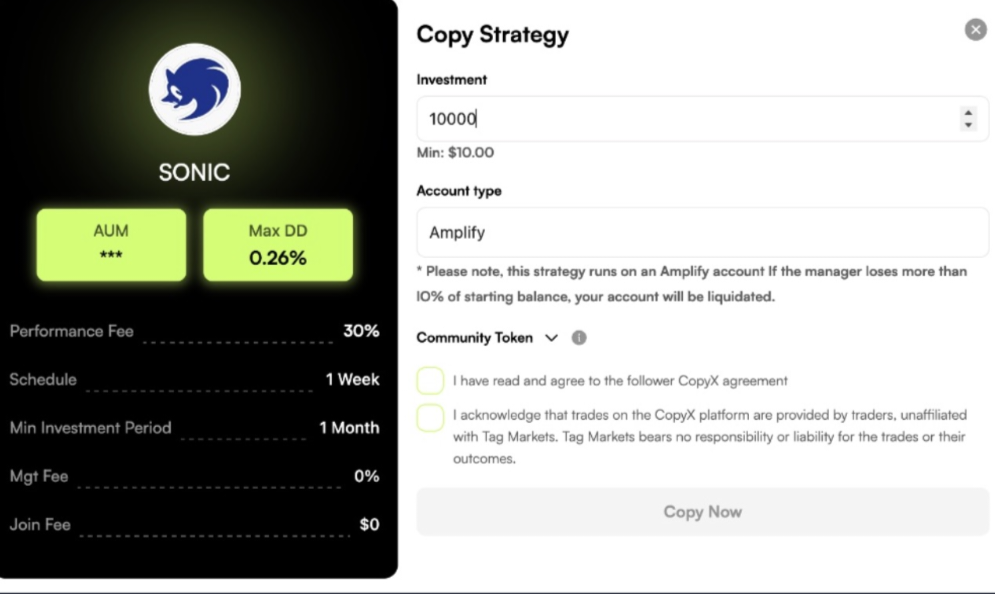
The Copy Strategy window will open.
Enter your investment amount in USD. The minimum amount is $10.
The account type is Amplify.
Choose Your Leverage
12X Standard — Default
$1,000 → $12,000 trading capital
10% drawdown — maximum account loss.
No Token is required.
24X Amplified
$1,000 → $24,000 trading capital
5% drawdown
A Token is required.
Higher leverage increases the potential size of both gains and losses. The next step explains how to enter the required Community Token.
12. How to Enter the Token
To use 24X leverage, you need a Token code.
Token: #aitech
Enter the token in the Token dropdown menu inside the Copy Strategy window and click “Verify.”
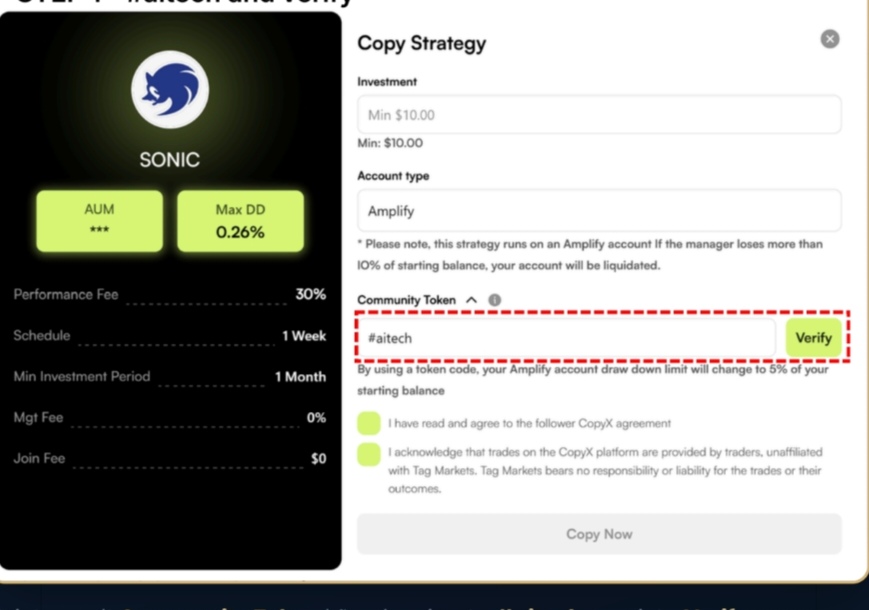
According to the platform’s description, the token changes the drawdown limit on your Amplify account to 5% of the initial balance.
After the token has been verified, a HASH/GU-ID field will appear in the same area.
HASH/GU-ID: 00
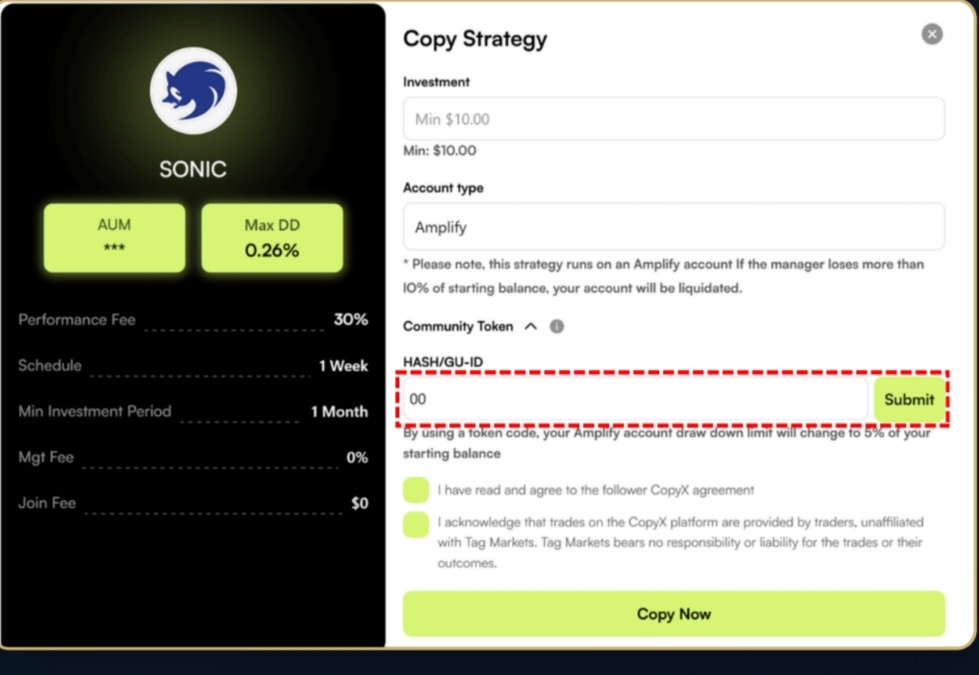
Click “Submit.”
Tick both consent boxes and click “Copy Now.”
Your automated trading account is now active, and you can monitor your trades on an ongoing basis.
Go to Follower Hub to view your trades.
The Trades tab shows each trade executed by Sonic, including the entry price, exit price, trading period, and PnL.
The Strategies tab is where you manage your funds.
Click “Withdraw” whenever you want to request a withdrawal of profits or your initial deposit.
When making a withdrawal, choose:
– Profits — profits only
– Deposit — part of your original capital
According to the platform’s terms, profits can be withdrawn from the first day.
The initial deposit becomes available for withdrawal after a 30-day lock-up period.
Kraken
Krüpto ostmine Krakeni platvormil ja selle saatmine Sonic kauplemissüsteemi.
1. Kraken konto loomine
Samm1 – Ava kraken veebileht Siit
Avaneb uus leht. Lehe ülemises paremas nurgas vajuta: Sign up
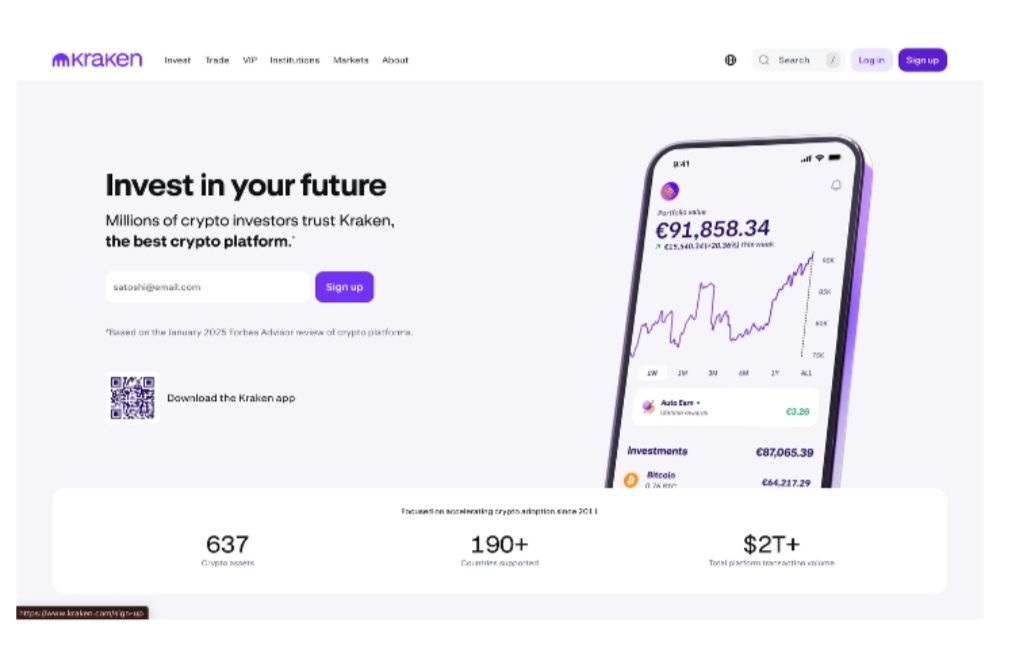
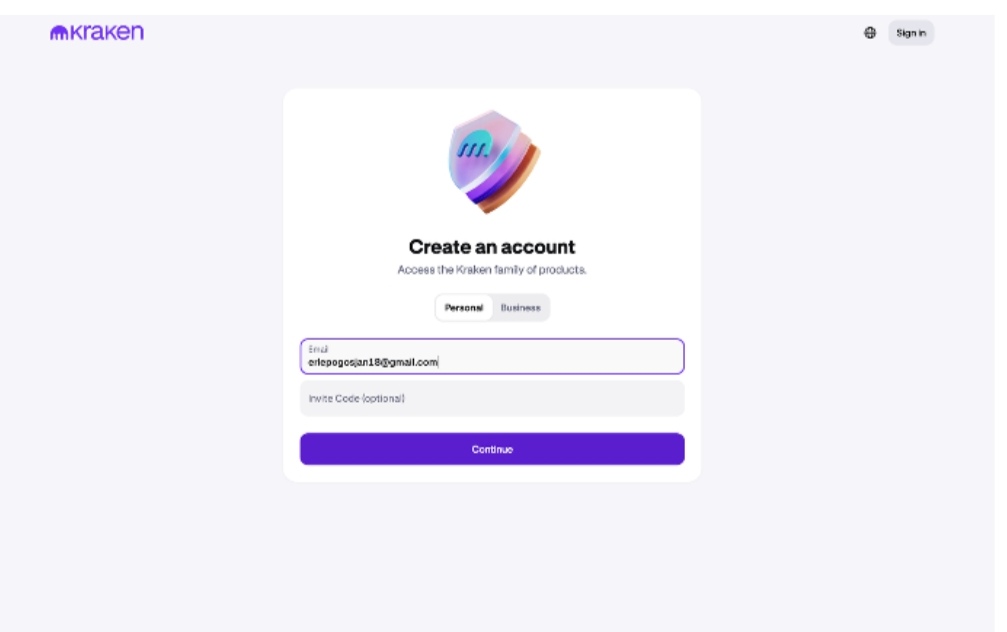
Samm 2 – Sisesta oma email ja alusta konto loomist
Sisesta oma emaili aadress.
Invite Code väli on valikuline ja selle võib tühjaks jätta.
Seejärel vajuta nuppu Continue.
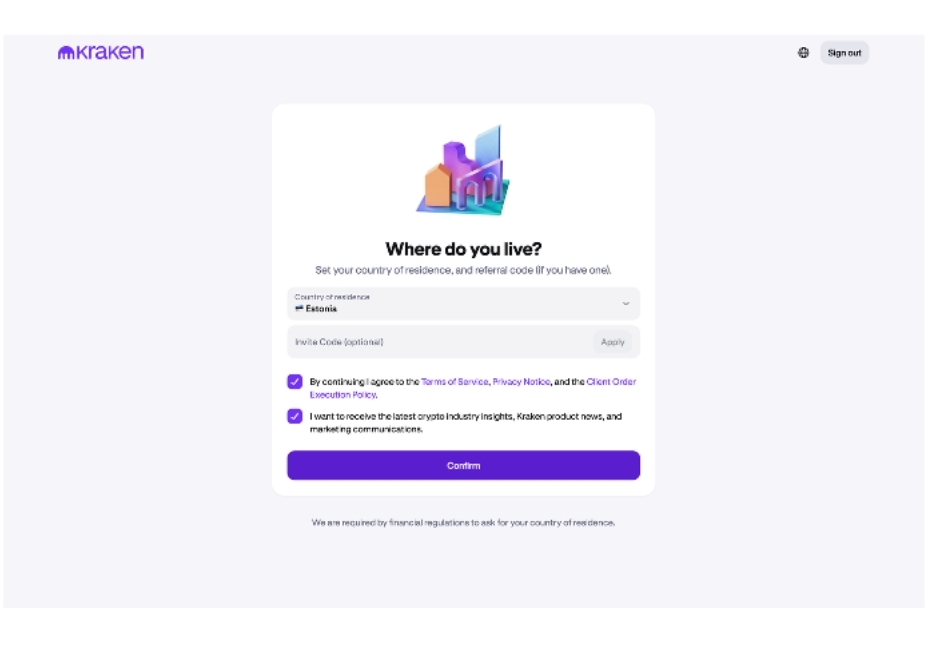
Samm 3 – Vali oma elukohariik
Vali rippmenüüst Country of residence oma elukohariik.
Näiteks Estonia
Invite Code väli on valikuline.
Märgi linnukesega nõustumine kasutustingimustega.
Vajuta Confirm, et jätkata konto loomist.
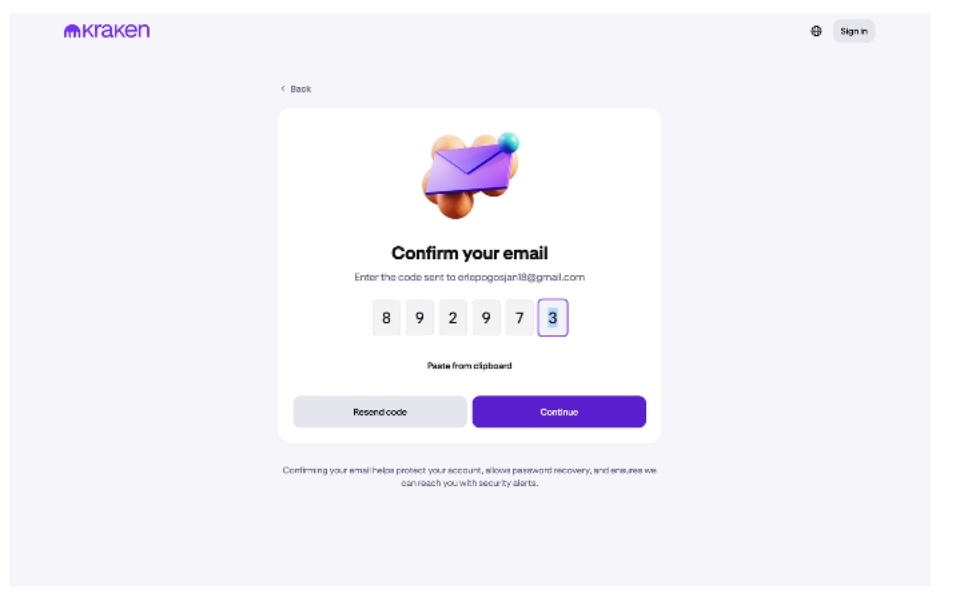
Samm 4 – Kinnita oma email
Ava oma emaili postkast.
Leia kiri, mille saatis Kraken.
Kopeeri/jäta meelde emailis olev 6-kohaline kinnituskood.
Sisesta see kood vastavatesse lahtritesse.
Vajuta Continue, et jätkata konto loomist.
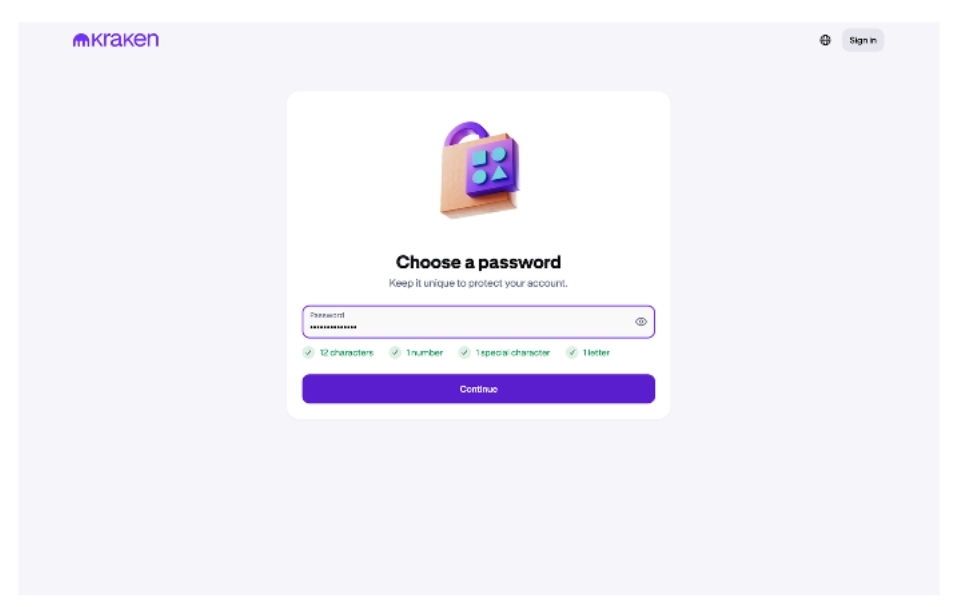
Samm 5 – Loo konto parool
Sisesta Password lahtrisse oma parool.
Parool peab sisaldam:
vähemalt 12 tähemärki
vähemalt 1 numbrit
vähemalt 1 erimärki
vähemalt 1 tähte
Kui parool vastab nõuetele, vajuta Continue.
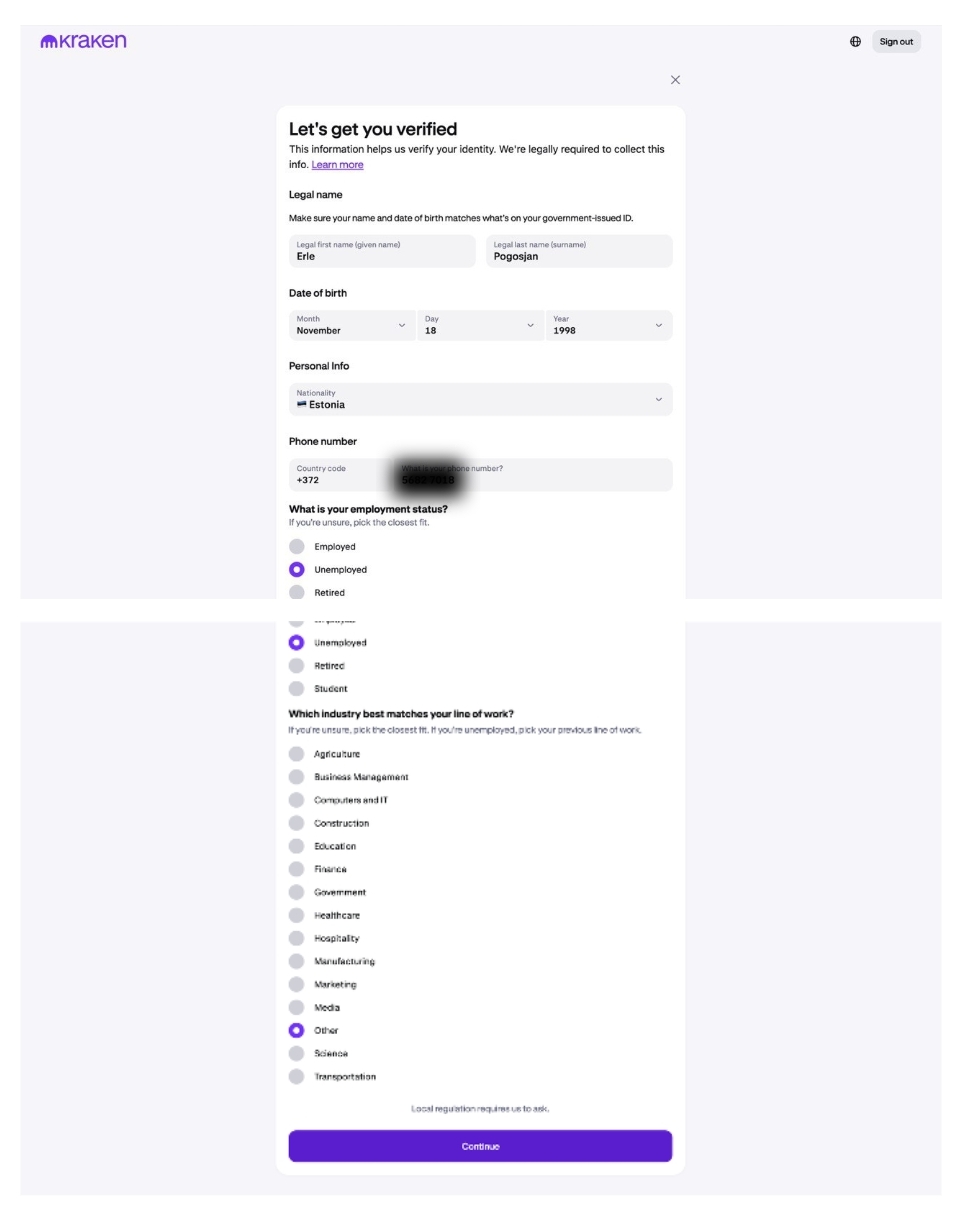
Samm 6 – Sisesta oma isikuandmed
1. Siseta oma eesnimi ja perekonnanimi täpselt nii, nagu see on sinu isikut tõendaval dokumendil (ID-kaart või pass).
2. Sisesta oma sünnipäev:
kuu
päev
aasta.
3. Vali kodakondsus (Nationality)
4. Sisesta oma telefoninumber koos riigikoodiga.
5. Vali oma tööhõive staatus:
Näiteks Employed, Unemployed, Student jne.
6. Vali valdkond, millega sinu töö on kõige rohkem seotud.
Kui ükski valik ei sobi, vali Other.
7. Kui kõik andmed on sisetatud, vajuta Continue.
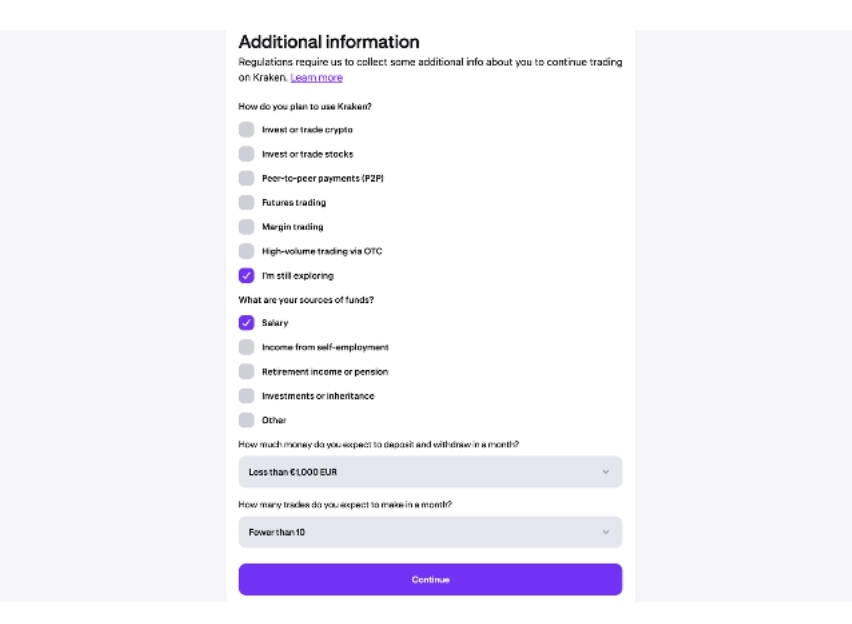
Samm 7 – Täida lisainfo (Additional information)
1. Vali, kuidas plaanid Krakenit kasutada.
Näiteks:
- Invest or trade crypto (investeerimine või krüptoga kauplemine)
- I’m still exploring (ma alles uurin võimalus).
3. Vali, kust pärineb sinu raha (Source of funds).
Näiteks:
- Salary (palk)
- Income from šelf-employment (ettevõtlustulu)
- Investments or inheritance (investeeringud või pärandus).
4. Vali, kui palju raha plaanid kuus sisse kanda või välja võtta.
Näiteks:
- Less than €1,000 EUR.
5. Vali, mitu tehingut plaanid kuus teha.
Näiteks:
- Fewer than 10.
6. Kui kõik valikud tehtud, vajuta Continue.
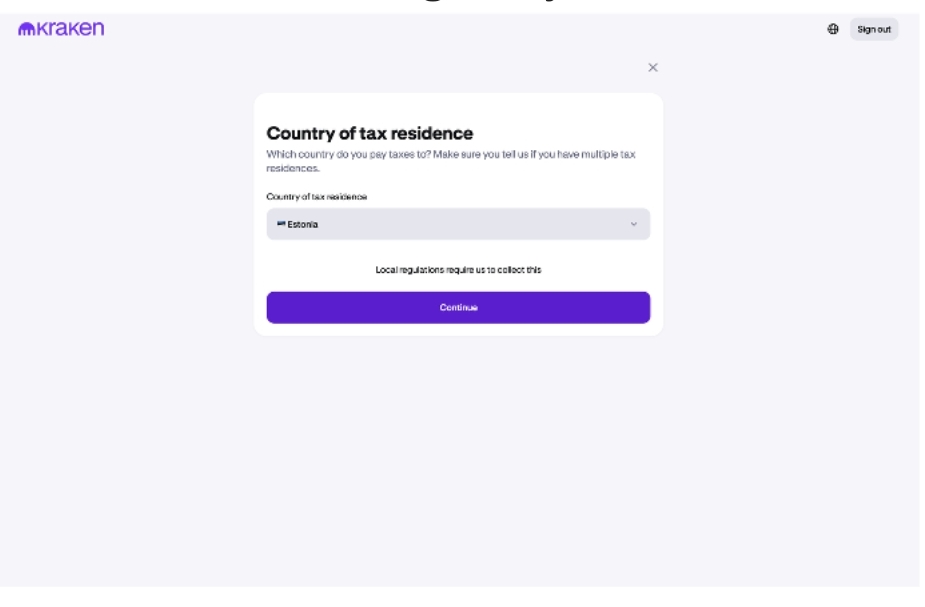
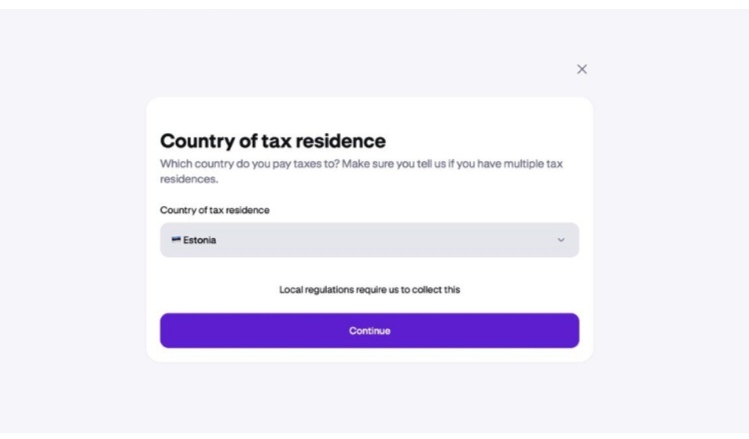
Samm 8 – Määra maksuresidentsuse riik
1. Kontrolli, et Country of tax residence oleks õige.
Näiteks: Estonia.
2. Kui riik on õige, vajuta Continue.
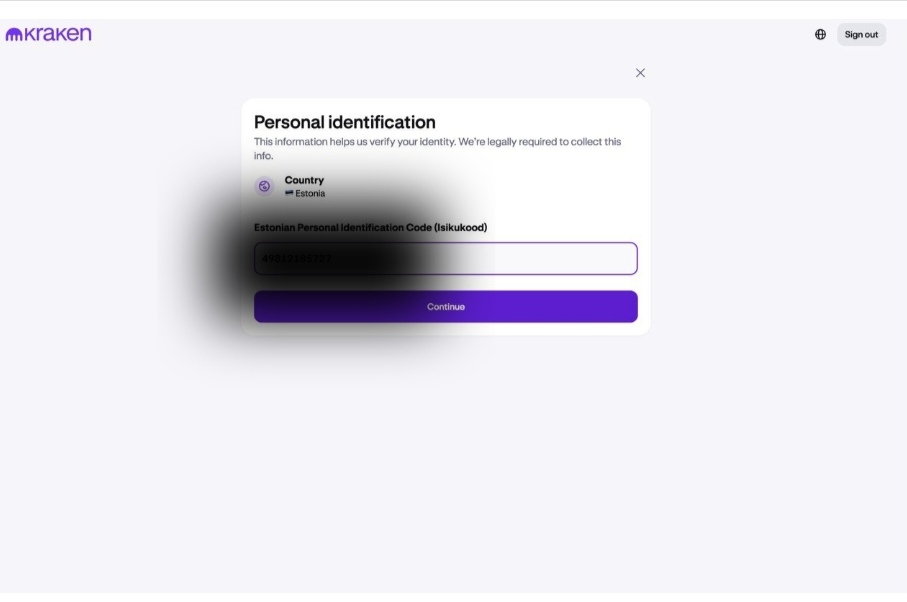
Samm 9 – Sisesta isikukood
1. Veendu, et riik oleks Estonia.
2. Sisesta lahtrisse oma isikukood.
3. Vajuta Continue, et jätkata.
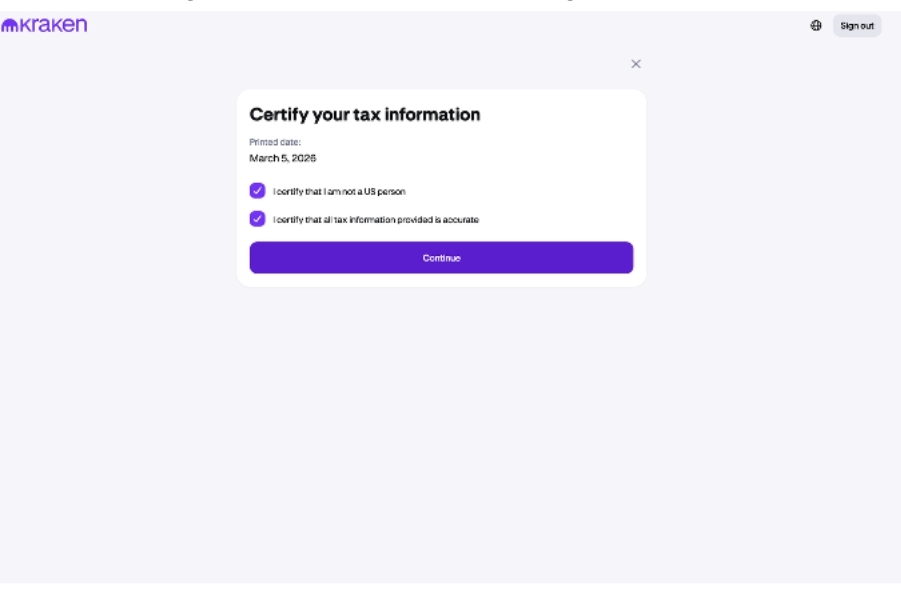
Samm 10 – Kinnita maksualane info
1. Märgi linnuke, et sa ei ole USA isik (US person).
2. Märgi linnuke, et esitatud maksualane info on õige.
3. Vajuta Continue, et jätkata.
Samm 11 – Vali dokumendi riik.
1. Vali riik, kust sinu isikut tõendav dokument on pärit.
Näiteks: Estonia
2. Vajuta Continue.
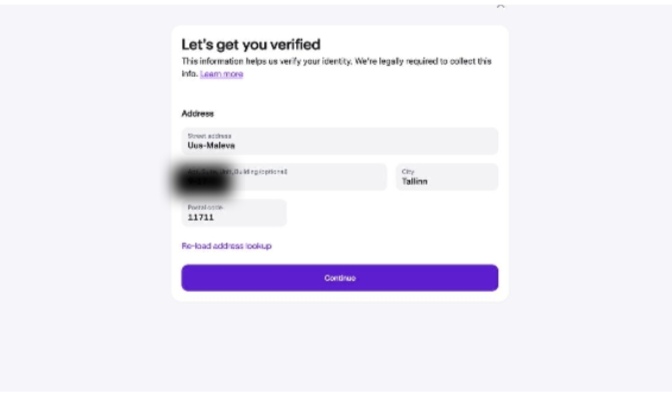
Samm 12 – Sisesta oma aadress
1. Sisesta oma kodune aadress:
- tänav
- korter
- linn
- postiindeks
2. Kontrolli, et andmed oleksid õiged.
3. Vajuta Continue.
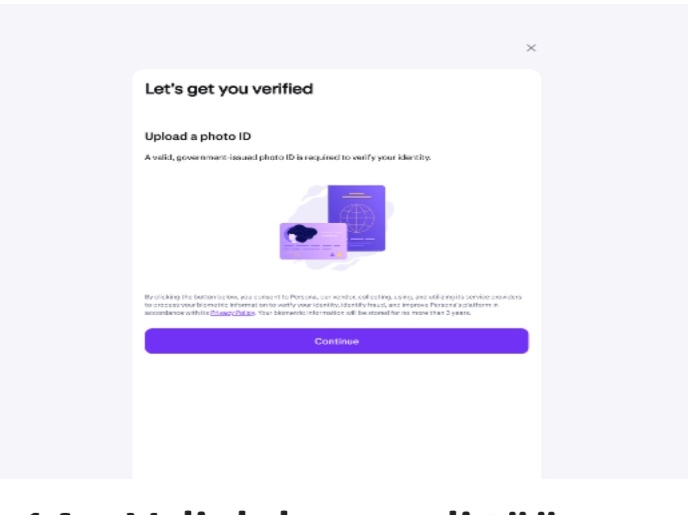
Samm 13 – Alusta dokumendi üleslaadimist
1. Kraken palub laadida üles isikut tõendava dokumendi foto.
2. Vajuta Continue, et alustada.
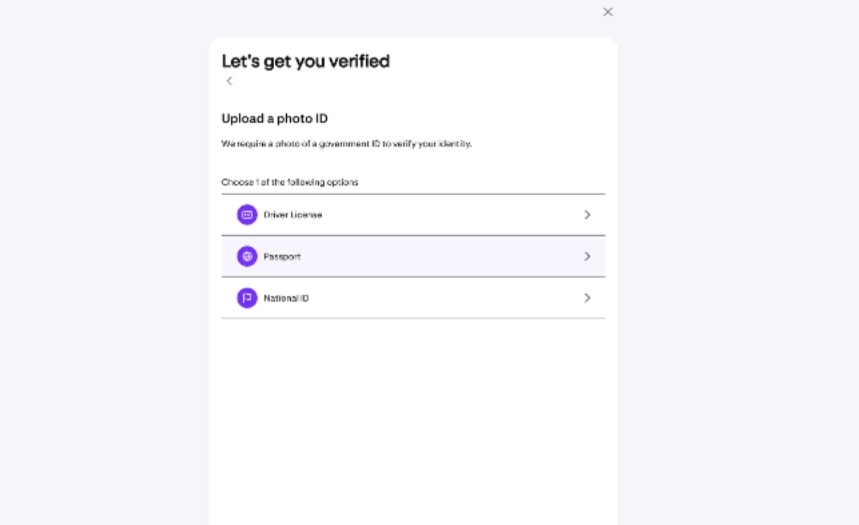
Samm 14 – Vali dokumendi tüüp
Vali üks järgmistest:
- Passport – pass
- National ID – ID-kaart
- Driver License – juhiluba
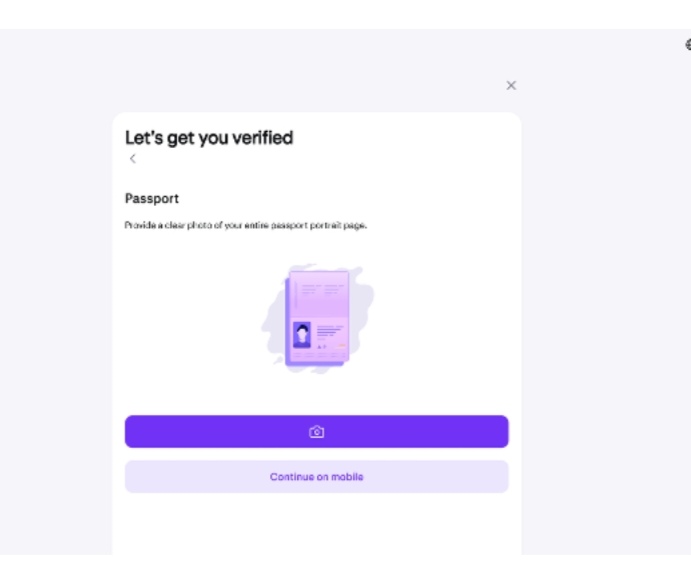
Samm 15 – Valmistu passi pildistamiseks
1. Valmista ette nt oma pass.
2. Ava pass lehel, kus on sinu foto ja andmed.
3. Veendu, et:
- kogu leht oleks nähtav
- pilt oleks selge
- valgus oleks piisav.
4. Vajuta kaamera nuppu, et teha foto.
Kui kasutad telefoni, võid valida ka Continue on mobile.
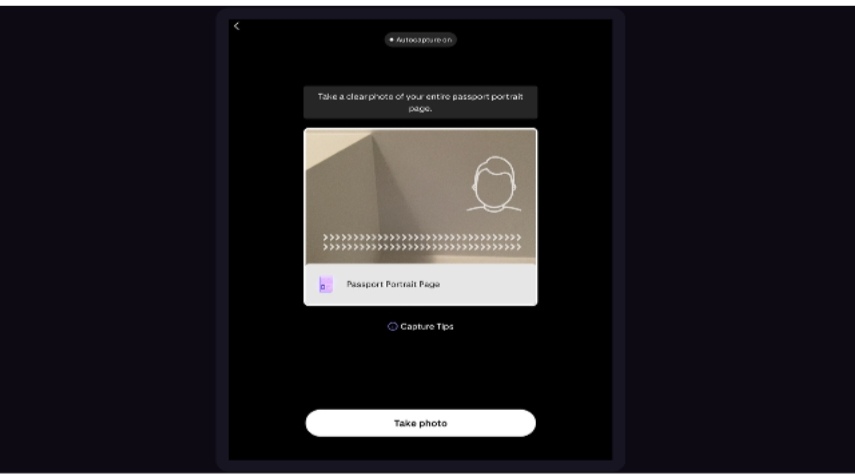
Samm 16 – Tee dokumendist foto
1. Tee selge foto oma dokumendist.
2. Veendu, et:
- kogu dokument oleks pildil
- tekst oleks loetav
- pilt oleks terav.
3. Vajuta Take photo.
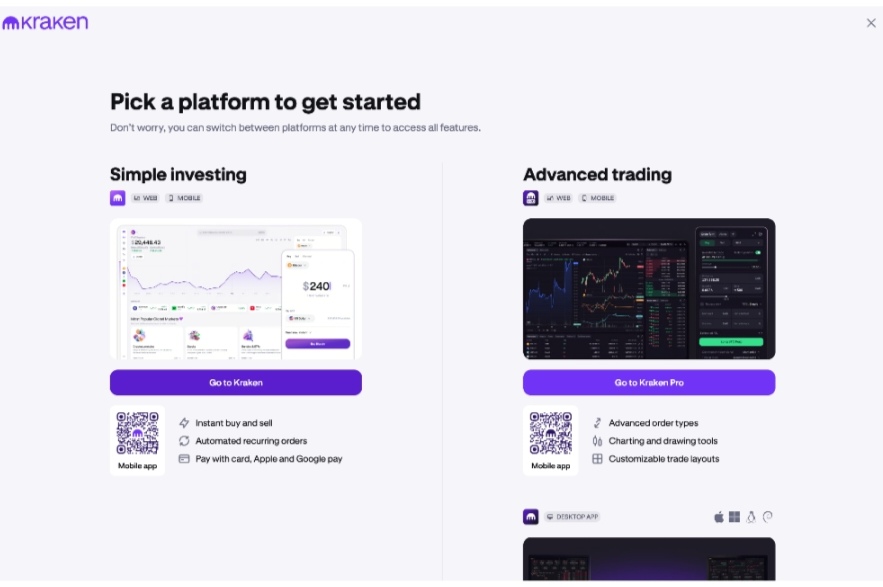
Samm 17 – Vali kasutatav Kraken platvorm
Kraken küsib, millist platvormi soovid kasutada.
Valikud:
Simple investing (lihtne krüpto ostmine)
Advanced trading / Kraken Pro
Algajatele sobib tavaliselt Simple investing.
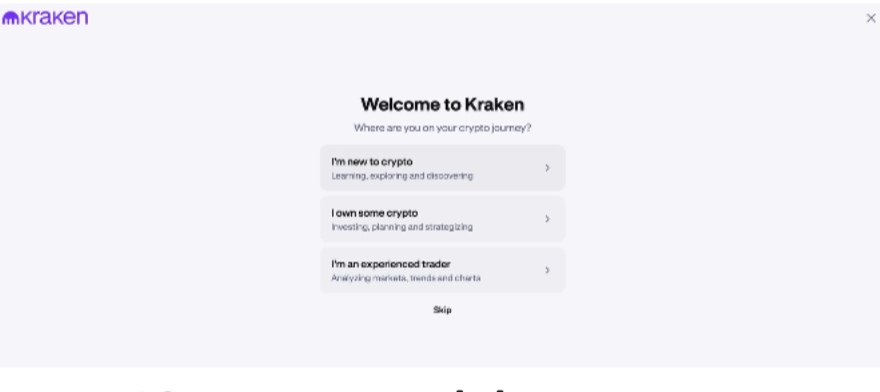
Samm 18 – Tere tulemast Krakenisse
Siin küsitakse sinu kogemuse kohta krüptoga.
Valikud:
- I’m new to crypto – olen krüptos uus
- I own some crypto – mul on juba krüptot
- I’m an experienced trader – olen kogenud kaupleja
Võid ka vajutada Skip.
Samm 19 – Konto avaleht
Kui verifitseerimine on tehtud, jõuad oma konto avalehele.
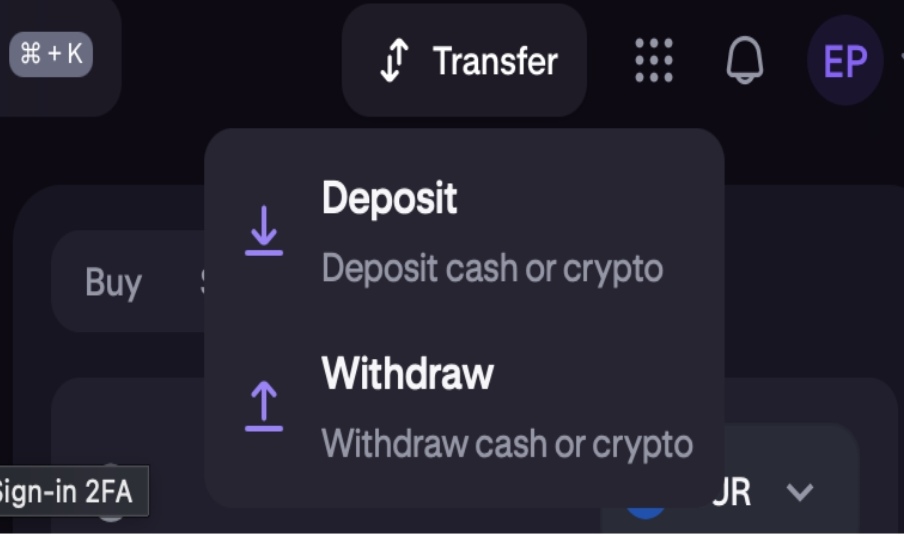
Liigu hiirega eksraani ülemises paremas nurgas olevale nupule Transfer.
Sealt avaneb kaks valikut:
- lisada raha (Deposit)
- saata krüptot (Withdraw)
Mida teha
- Vali lisada raha (Deposit)
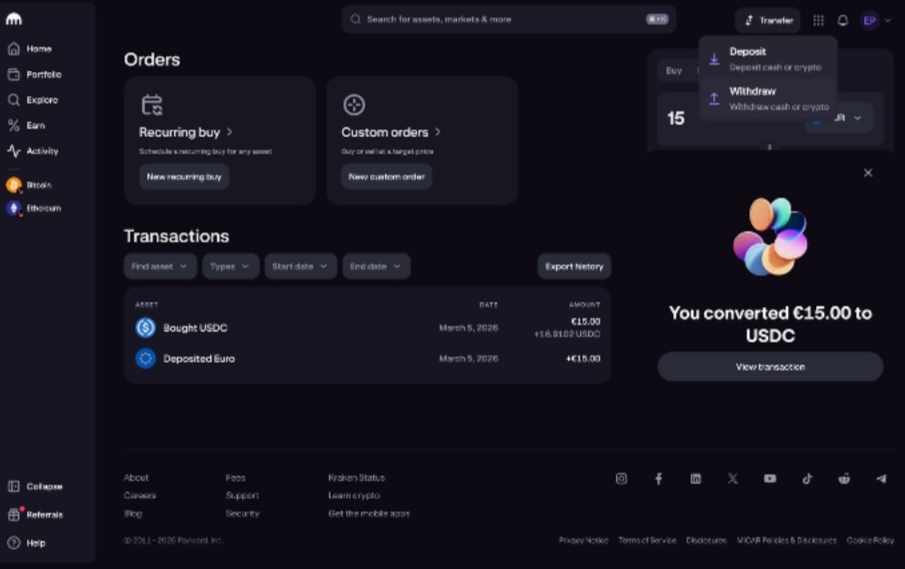
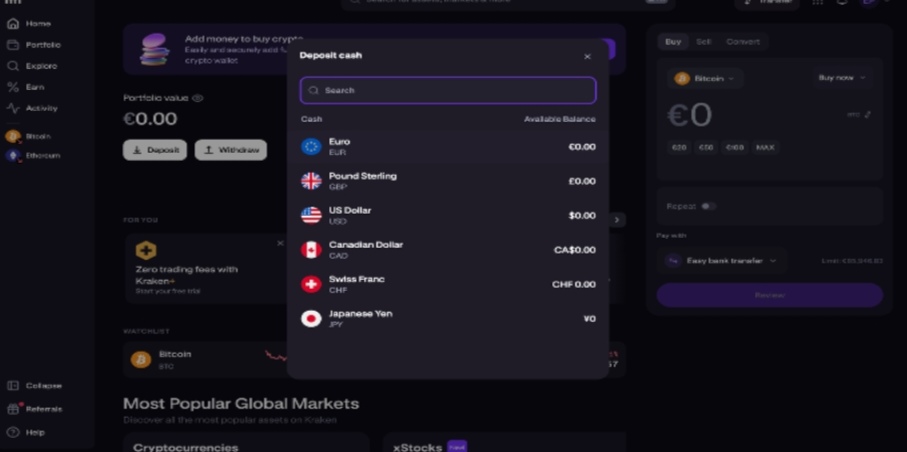
Samm 20 — Vali valuuta
- Avaneb Deposit cash aken.
- Vali Euro (EUR).
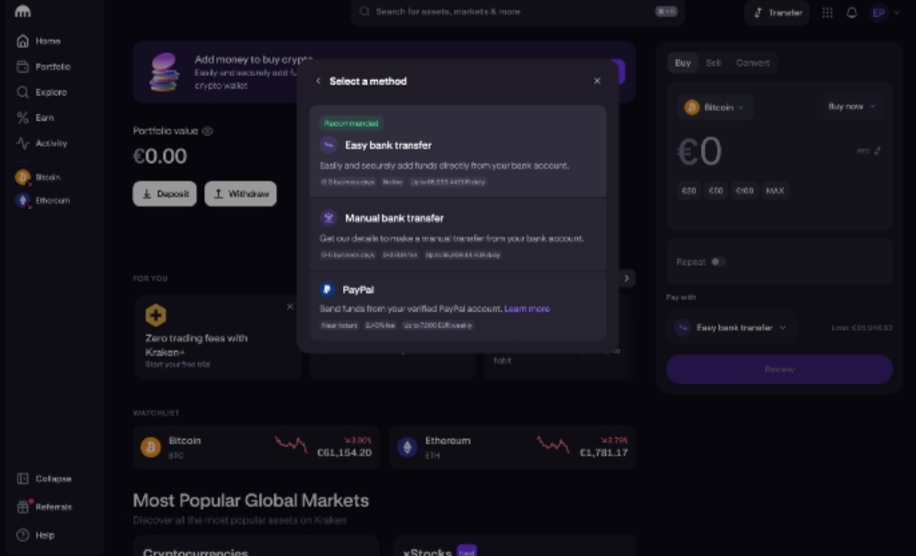
Samm 21 — Vali makseviis
- Avaneb makseviisi valimise aken.
- Vali Easy bank transfer (soovitatav).
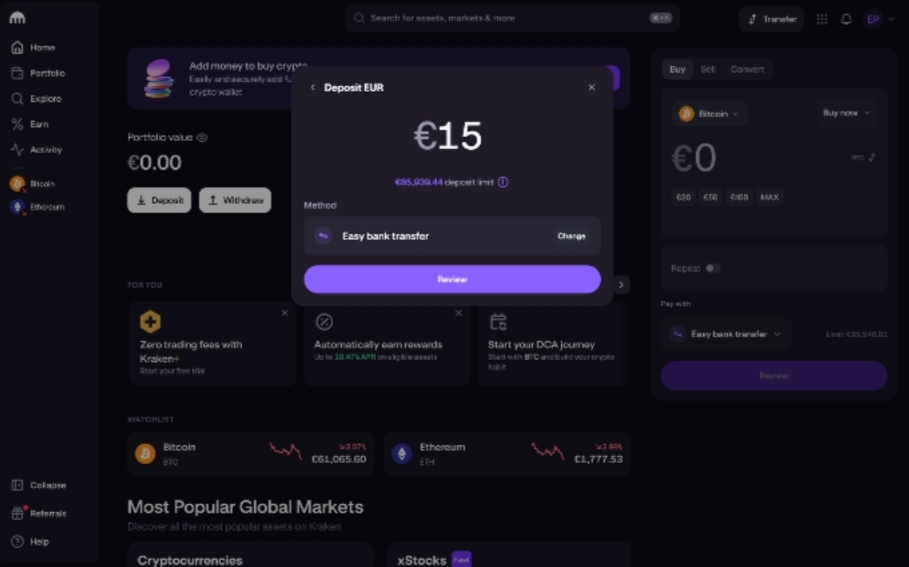
Samm 22 — Sisesta summa
- Sisesta summa, mida soovid kontole lisada. Näiteks: 15 €.
- Vajuta Review.
Samm 23 — Kinnita sissemakse
- Kontrolli sissemakse andmeid.
- Vajuta Continue to select your bank.
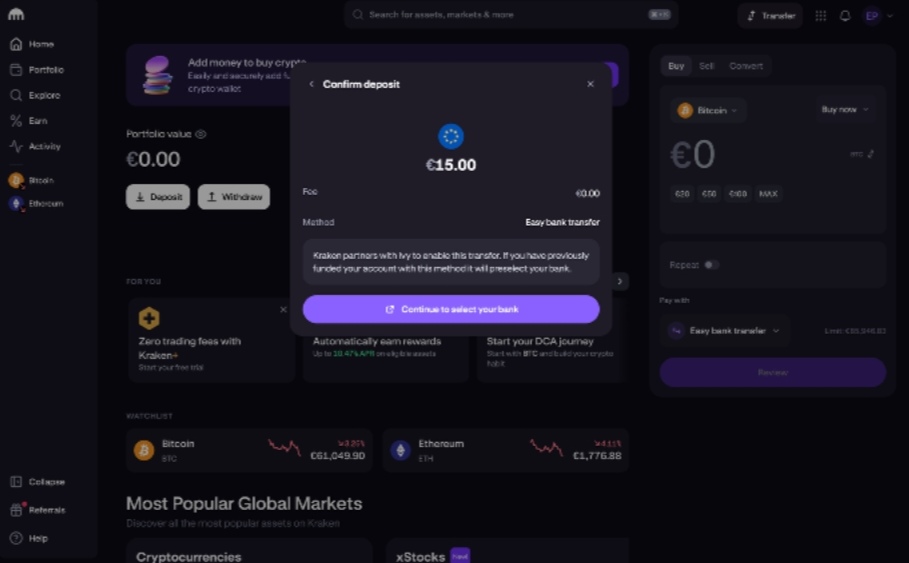
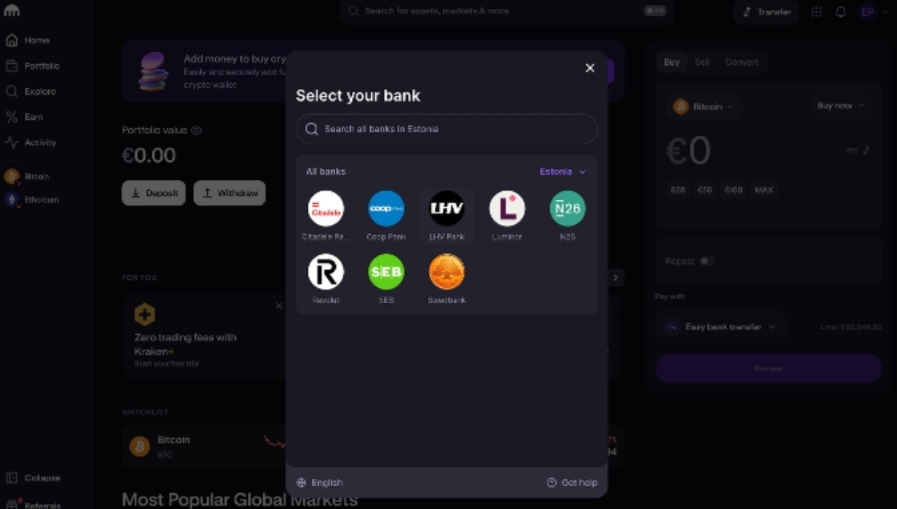
Samm 24 — Vali oma pank
- Otsi nimekirjast oma pank.
- Vali endale sobiv pank.
Näiteks: LHV
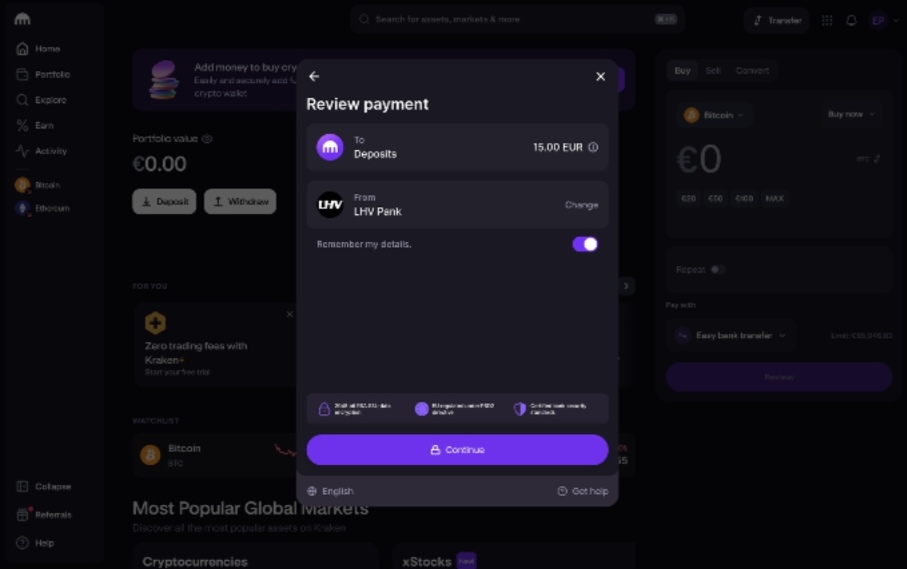
Samm 25 — Kontrolli makset
- Kontrolli makse andmeid.
Vajuta Continue.
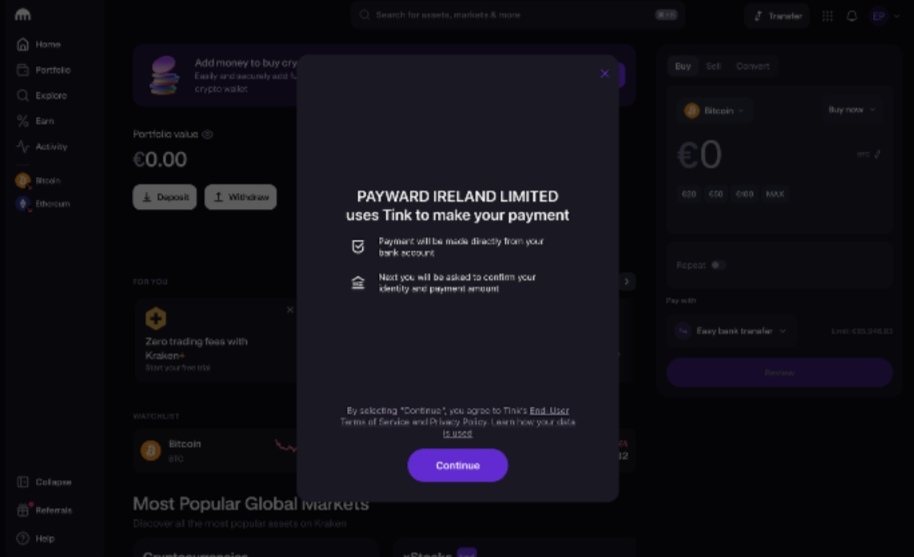
Samm 26 — Kraken kasutab makse jaoks Tink teenust.
Tink on turvaline sild krakeni ja sinu kodupanga vahel.
- Vajuta Continue.
Samm 27 — Ühenda oma pank
- Vajuta Open LHV log in.
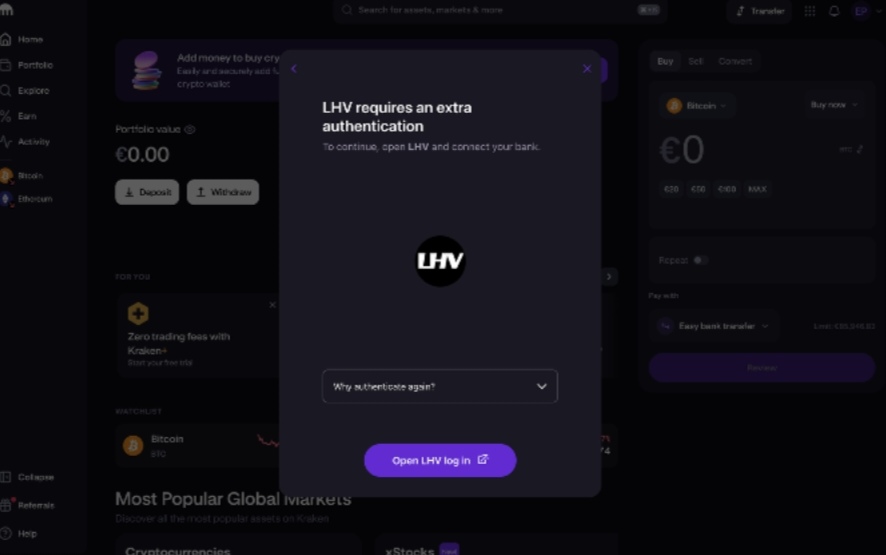
Samm 27 — Logi LHV internetipanka
- Logi sisse LHV internetipanka.
- Kasuta näiteks:
- Smart-ID
- Mobiil-ID
- ID-kaart
3. Kinnita makse.
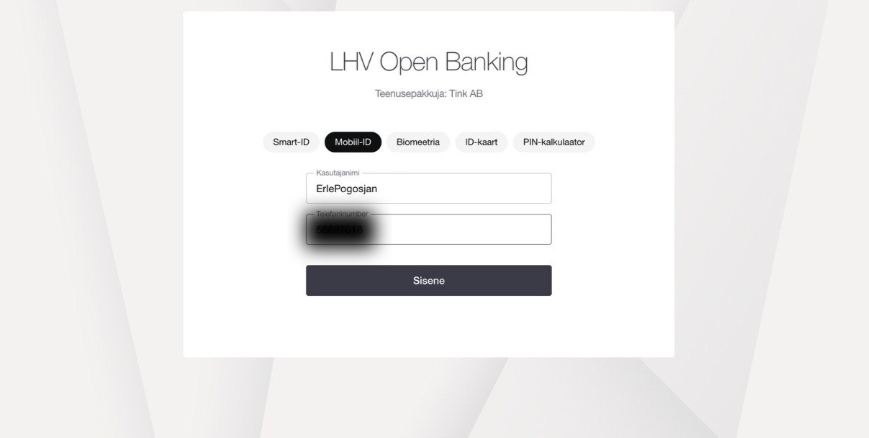
Pärast kinnitamist saadetakse raha sinu Kraken kontole.
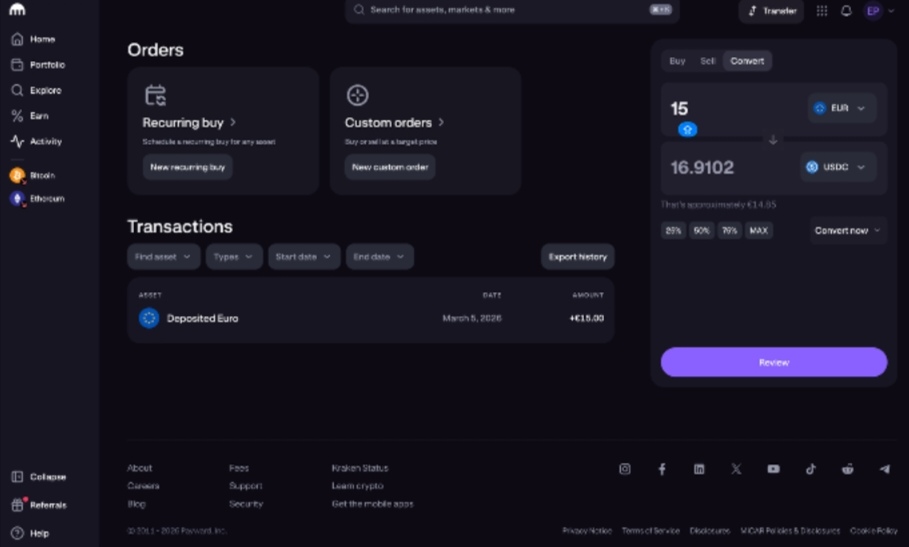
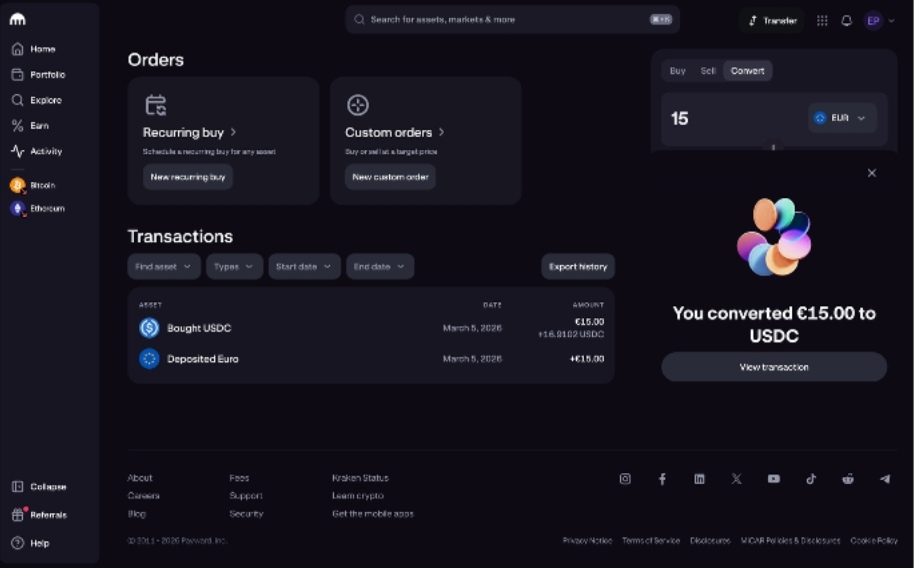
Samm 28 — Ava krüpto konverteerimine ja sisesta summa
Kui raha on Kraken kontol, saad selle konverteerida krüptoks.
- Paremal paneelil vali Convert.
- Sisesta summa, mida soovid konverteerida (näiteks 15 EUR).
- Vali sihtvaluutaks USDC.
- Vajuta Review.
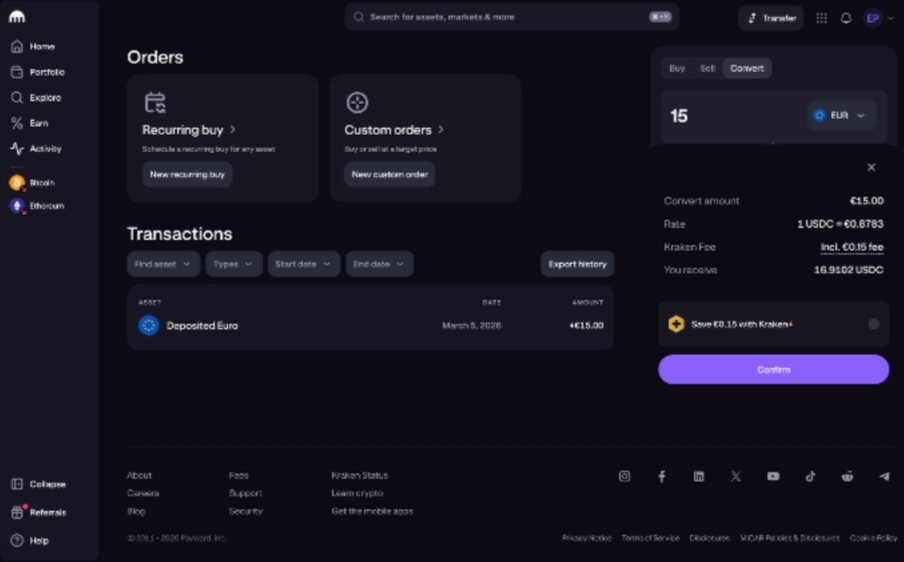
Samm 29 — Kontrolli konverteerimise andmeid
- Kontrolli tehingu andmeid (summa, kurss ja teenustasu).
- Vajuta Confirm.
Samm 30 — Konverteerimine on lõpetatud
- Kui tehing on kinnitatud, näed Krakenis kinnitust. Tuleb ka kinnitus email krakenilt.
- Ekraanile ilmub teade: You converted €15.00 to USDC
Kohe kohe oled valmis. Veel viimane samm ja saad oma raha kauplema panna.
Krüpto saatmine Krakenist TAG Markets kontole.
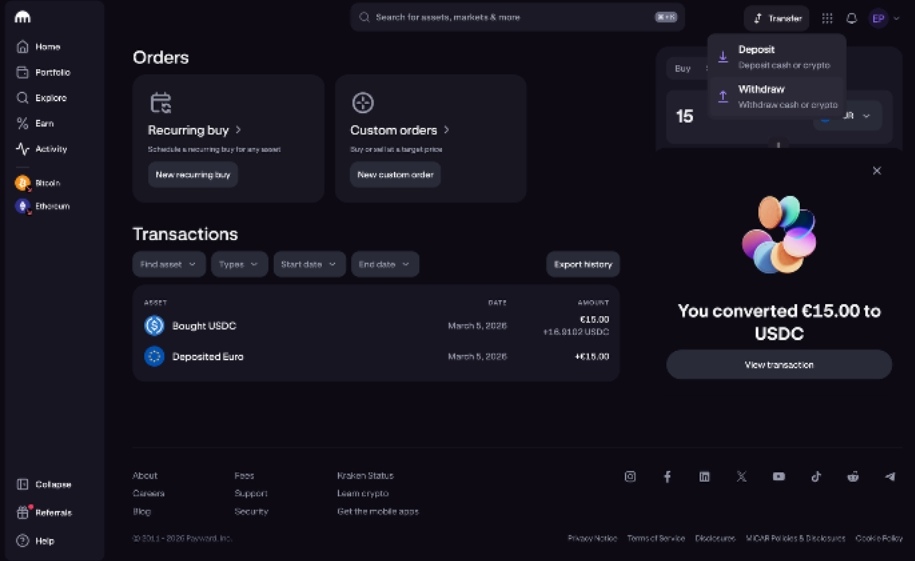
Samm 1 – Ava Krakenis ülekande menüü
- Üleval paremal klõpsa Transfer.
- Vali rippmenüüst Withdraw.
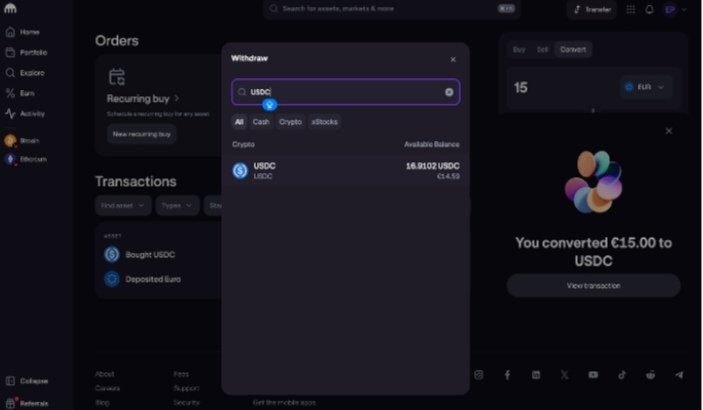
Samm 2 – Vali krüpto mida soovid saata
- Otsi või vali nimekirjast USDC.
- Klõpsa USDC.
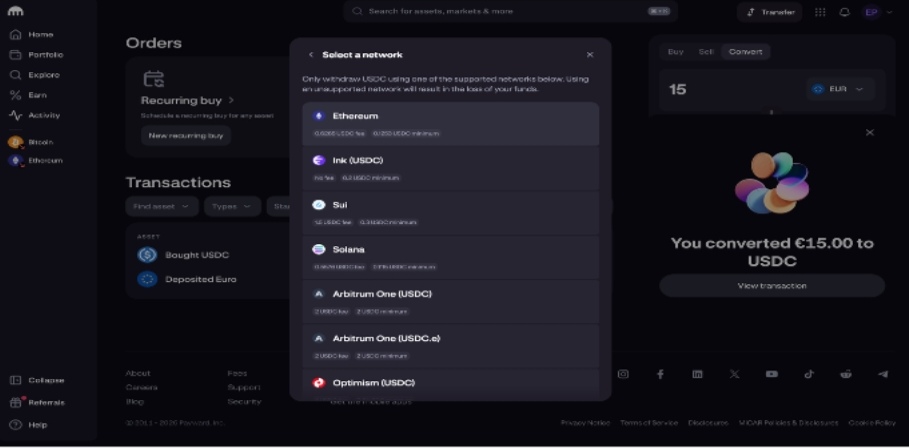
Samm 3 – Vali õige võrk
Kraken küsib nüüd millise võrgu kaudu soovid raha saata.
Vali nimekirjast: Ethereum
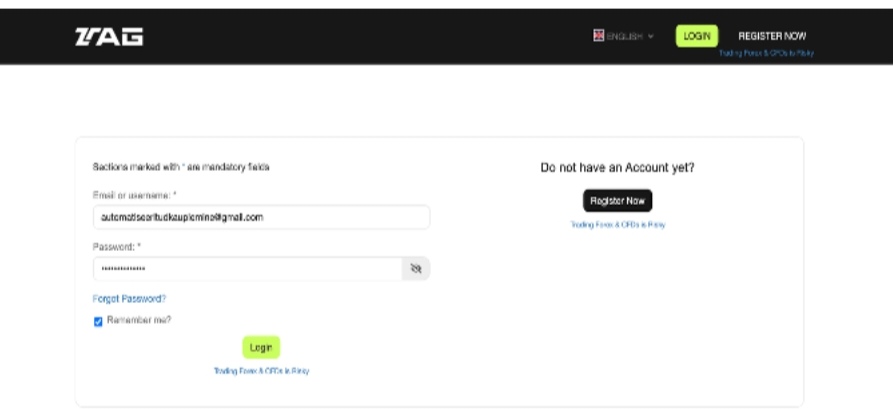
Samm 4 – TAG Markets kontosse sisse logimine
- Ava TAG Markets koduleht.
- Vajuta Login
- Sisesta email ja salasõna
- Vajuta login
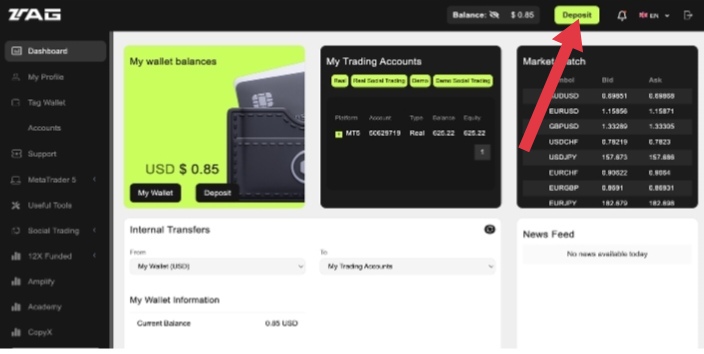
Samm 6 – Oled nüüd oma konto avalehel.
Vajuta üleval Deposit.
Avaneb aken Make a Deposit.
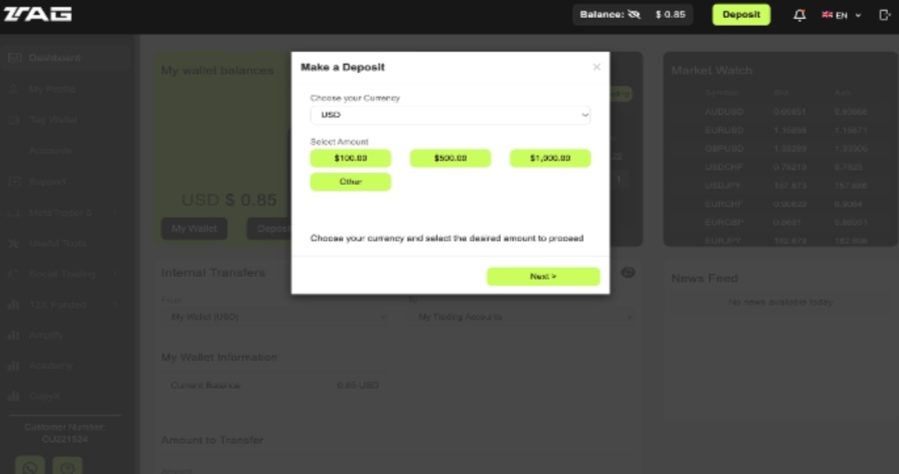
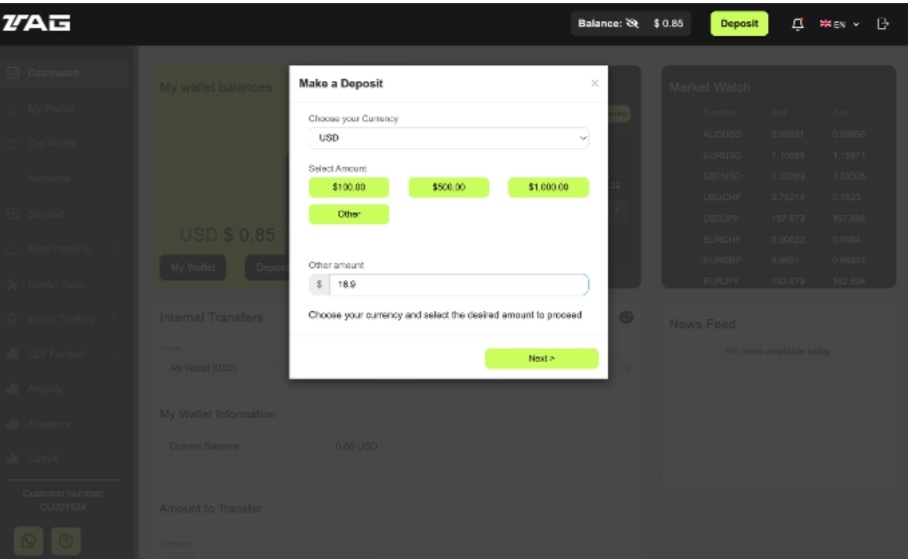
Samm 7 – Sisesta summa
- Vali USD valuutaks.
- Vali Other.
- Sisesta summa (näiteks 16.9 USD).
- Seejärel vajuta Next.
Samm 8 – Vali makseviis
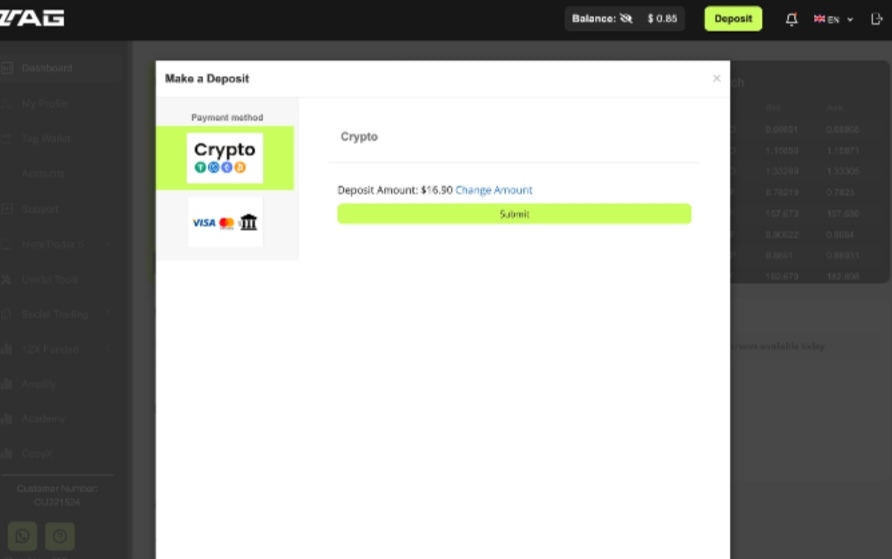
Maksmise viiside alt vali: Crypto
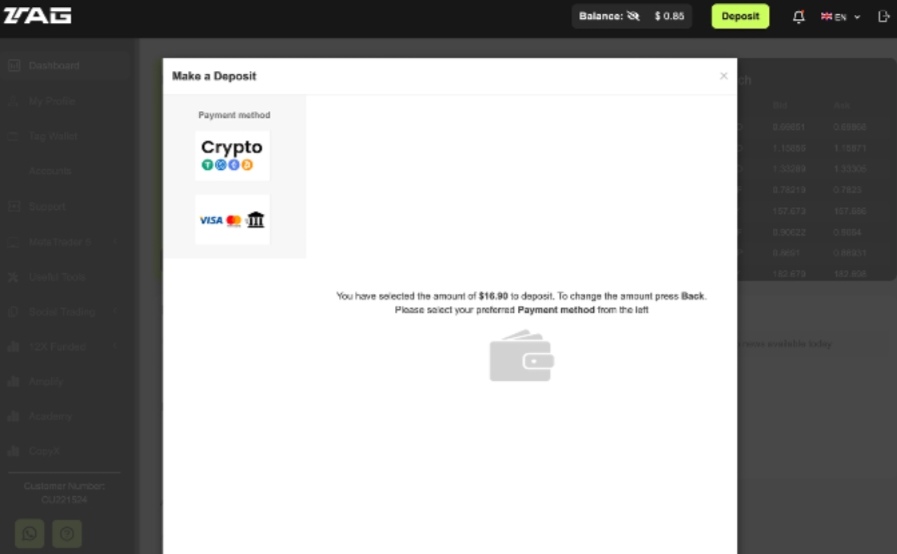
Vajuta Submit.
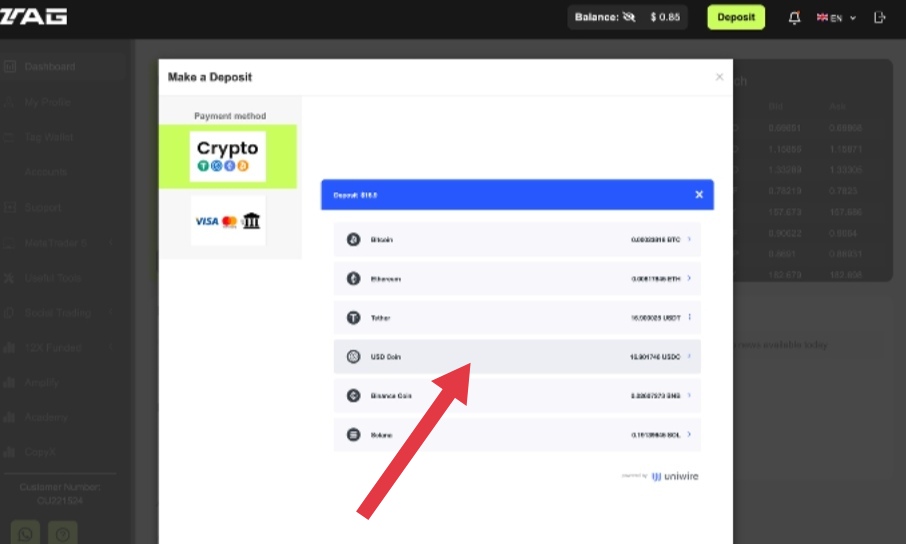
Samm 9 – Krüpto valimine
Vali nimekirjast USD Coin (USDC)
Samm 10 – Wallet aadress
Kopeeri wallet address.
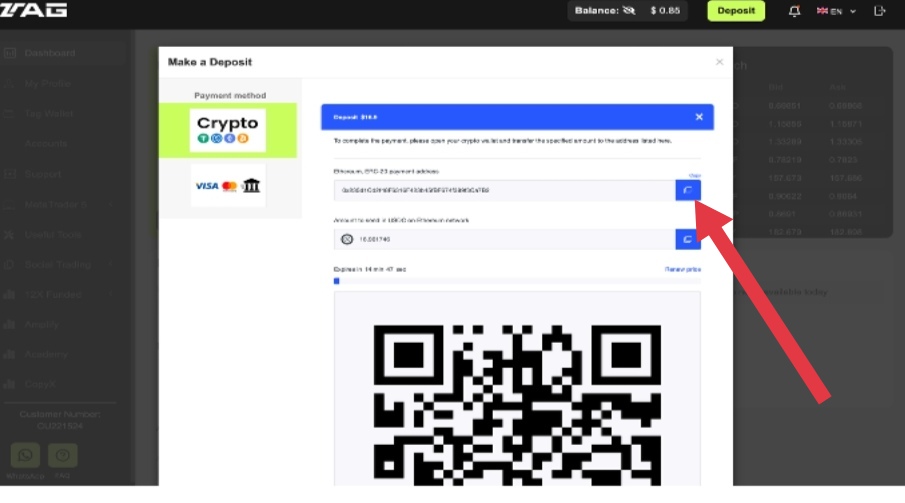
Samm 11 – Mine tagasi Krakenisse
- Klõpsa Transfer.
- Vali Withdraw.
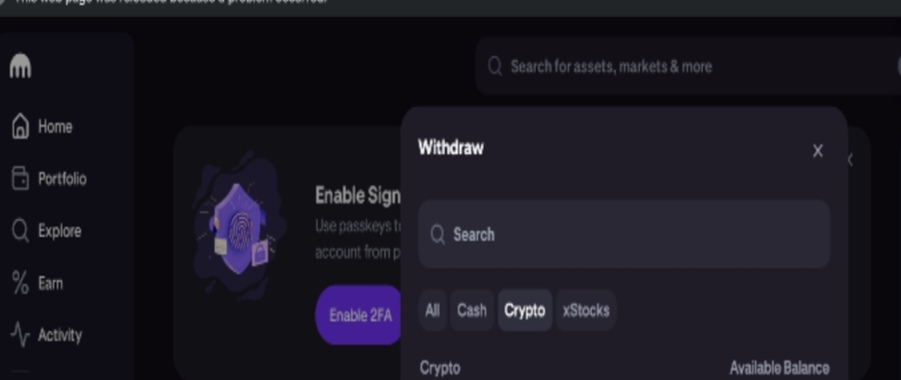
Vali Crypto.
Vali Tether USD.
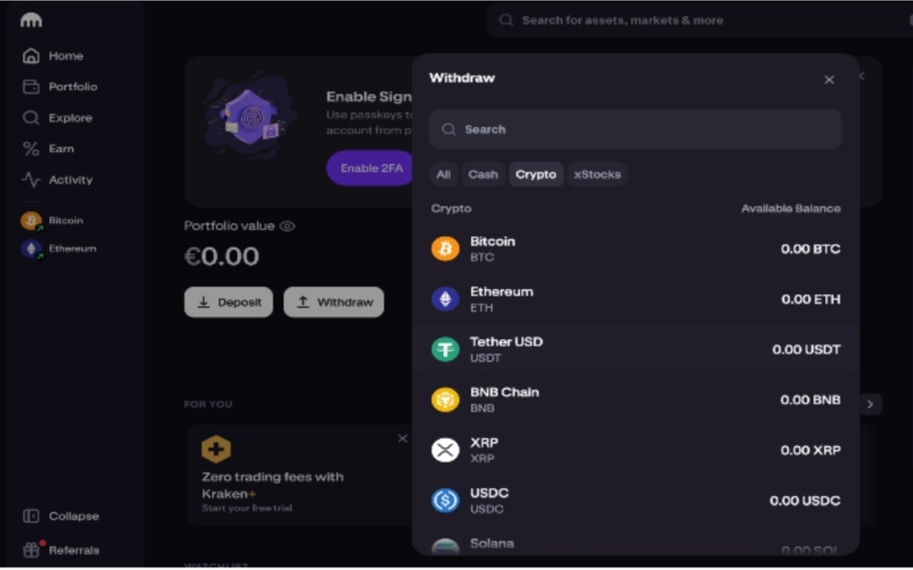
Järgmisena vali network: Ethereum.
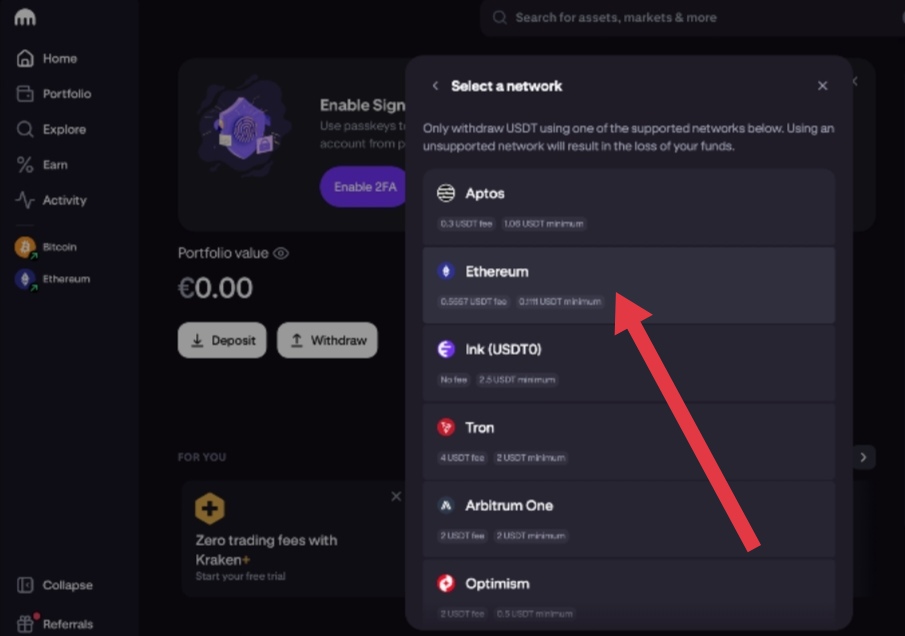
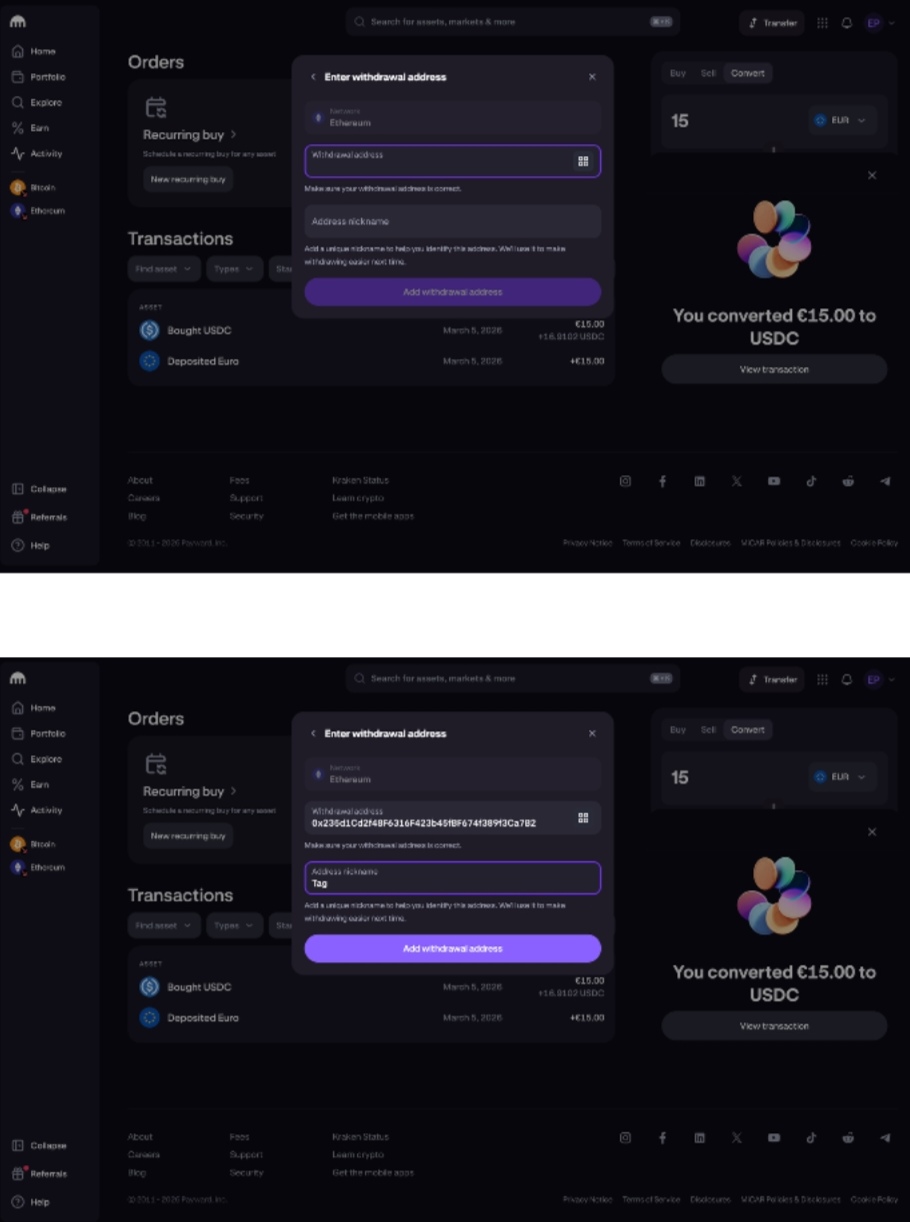
Samm 12 – Sisesta TAG Markets wallet aadress
- Kopeeri TAG Markets poolt antud wallet address.
- Kleebi see väljale Withdrawal address.
- Sisesta Address nickname (näiteks Tag).
- Vajuta Add withdrawal address.
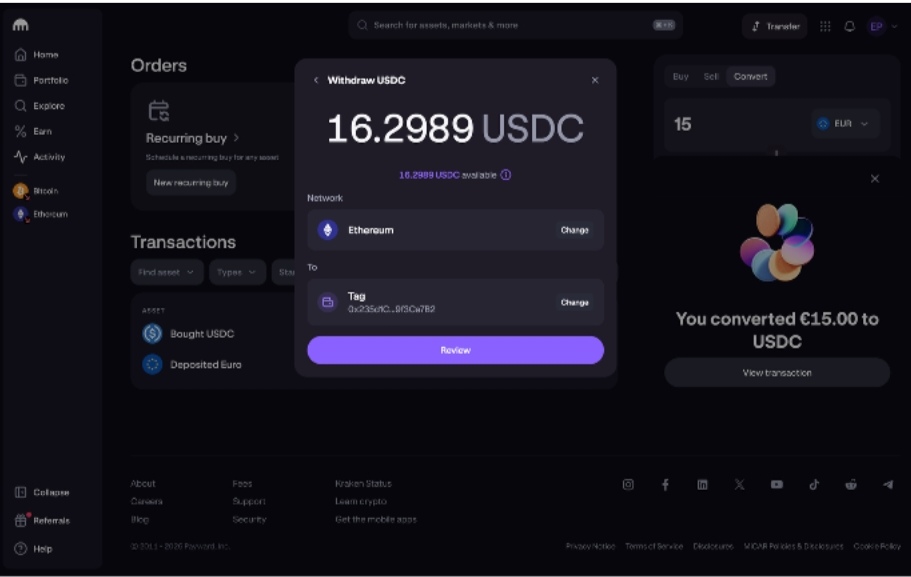
Klõpsa Review.
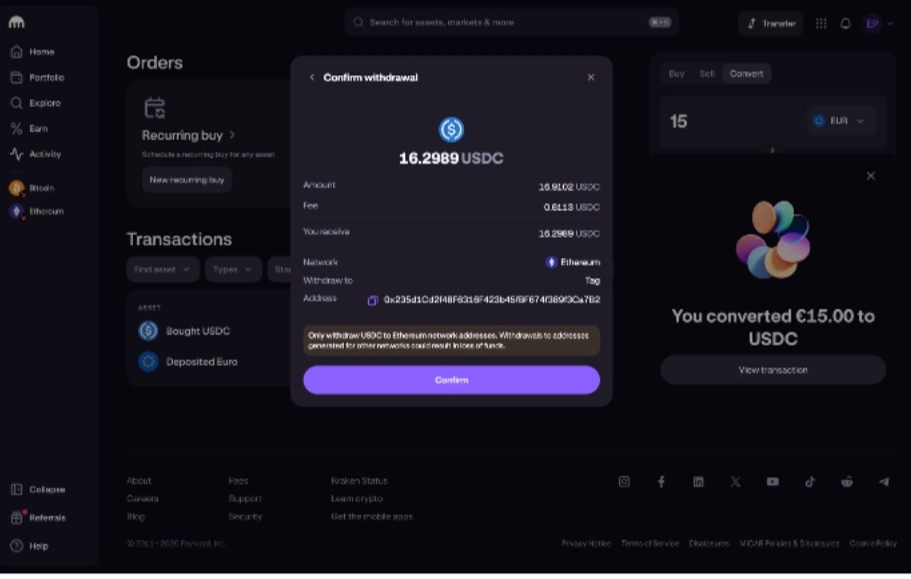
Klõpsa Confirm.
Samm 13 – Mine tagasi TAG Markets kodulehele
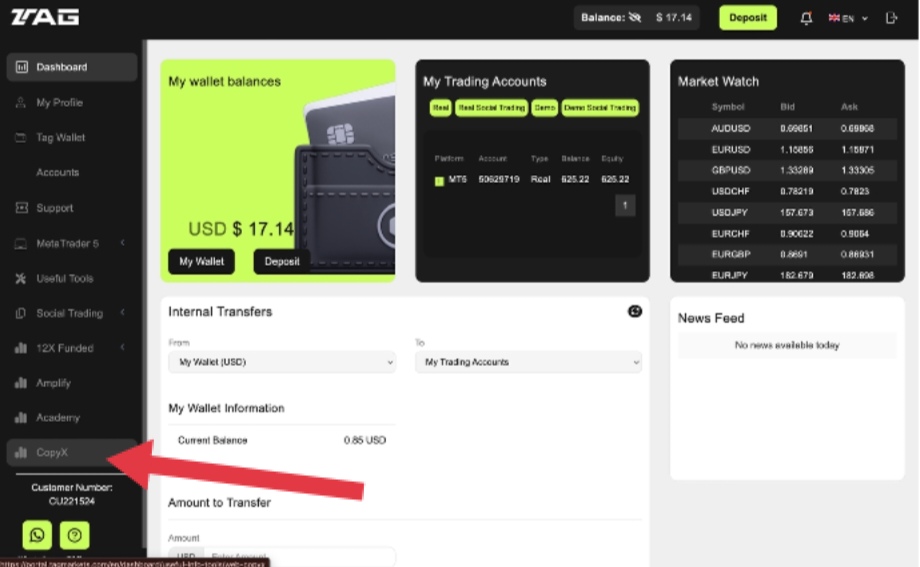
Kui raha on jõudnud TAG Markets walletisse, tuleb see kanda CopyX strateegisasse.
1. Ava vasakpoolses menüüs CopyX.
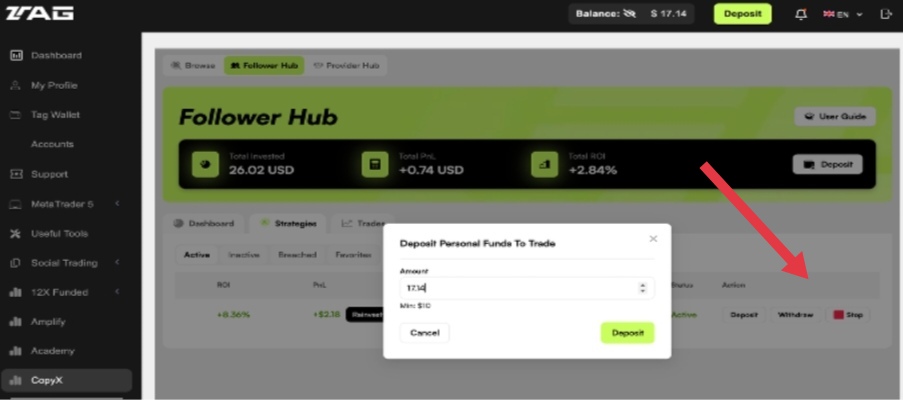
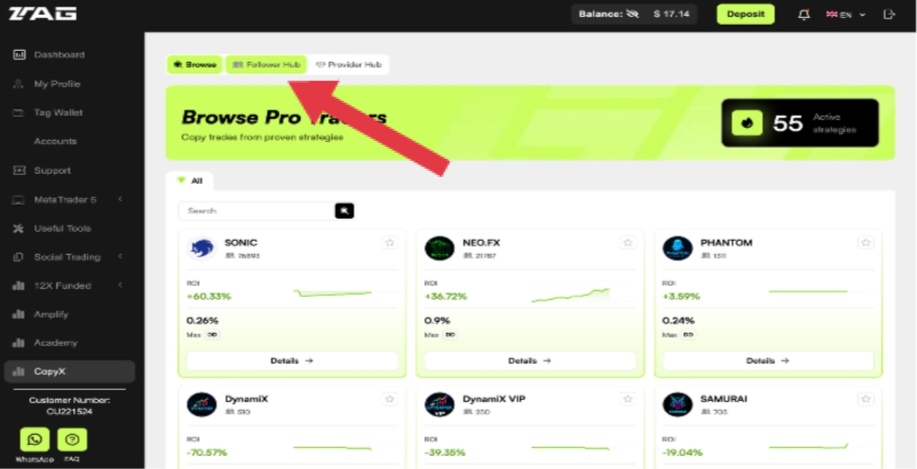
2. Vajuta Follower Hub
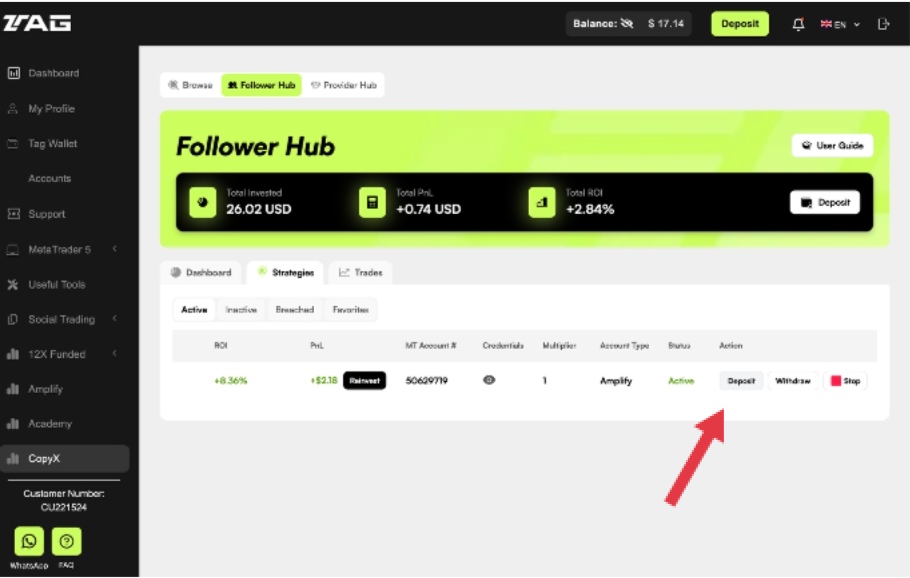
3. Vajuta Deposit.
Samm 15 – Sisesta summa
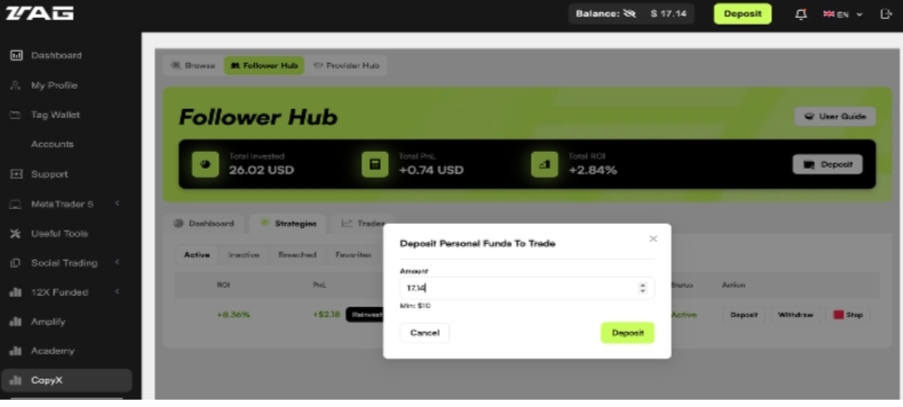
- Avaneb aken Deposit Personal Funds To Trade.
- Sisesta summa, mida soovid investeerida, Näiteks 17.14 USD.
- Minimaalne summa on 10 USD.
- Kui summa on sisestatud, vajuta Deposit.
Nüüd on raha edukalt Sonicu strateegiasse lisatud ja see hakkab automaatselt osalema tehingute kopeerimisel.
Kui tahad raha pausile panna ja mitte osaleda kauplemises siis vajuta stop nuppu. Sinu raha ei osale kauplemises ja kui 30 päevane lukk on möödas võid oma raha välja võtta. Enne kanna välja kasum(peab olema üle $1) ja siis ülejäänud kapital.